SOS Explorer® Quick Start Guide
SOSx Quick Start Guide
Permalink to SOSx Quick Start GuideCongratulations! You’ve installed SOS Explorer®. Let’s get you started on the basics of using it, keeping your datasets updated as well as adding and removing datasets.
Double-click on the SOS Explorer® icon on your desktop or look for SOS Explorer® in the Start menu. This will launch the application.

SOS Explorer® icon
Main Screen
Permalink to Main ScreenOn the main screen that pops up when first launching the software, you should see the Earth, a Dataset menu, buttons, and a Dataset Title.
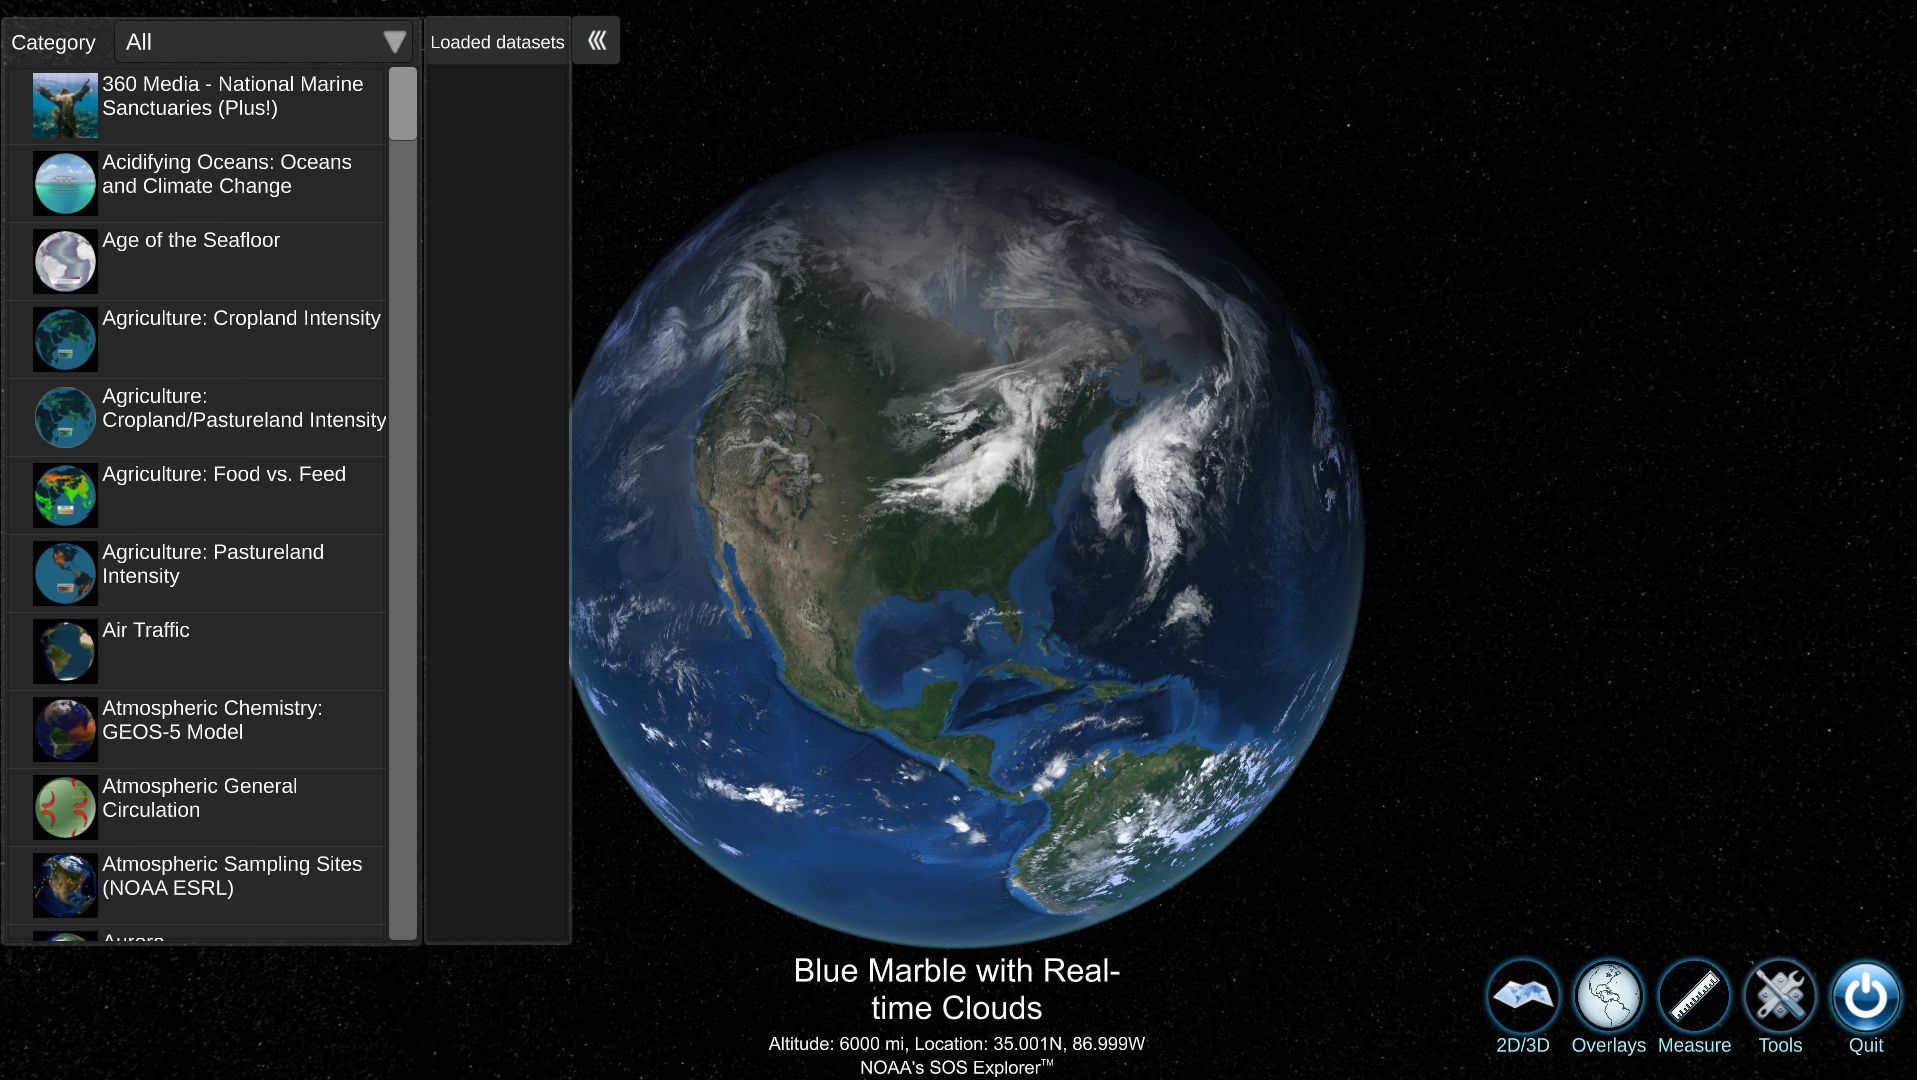
SOSx Main Screen
Basemap
Permalink to BasemapThe Basemap is the overlay image that is displayed over the SOSx globe. This includes real-time clouds, topography and bathymetry, nighttime lights, and real-time day/night lighting and is the first thing you can see when you open up SOSx.
Dataset Menu
Permalink to Dataset MenuUpon first launching the application, you will see the Dataset Menu open. To close it, click the green arrows on the upper right of the box.
Loading and Unloading a Dataset
Permalink to Loading and Unloading a DatasetClick or gently touch the dataset title to load. To close, either load a new dataset from the menu or press the X under Loaded datasets.
Categories
Permalink to CategoriesThe datasets are organized alphabetically by titles. If you want to see fewer datasets in the menu, the Category drop-down will refine your selection.
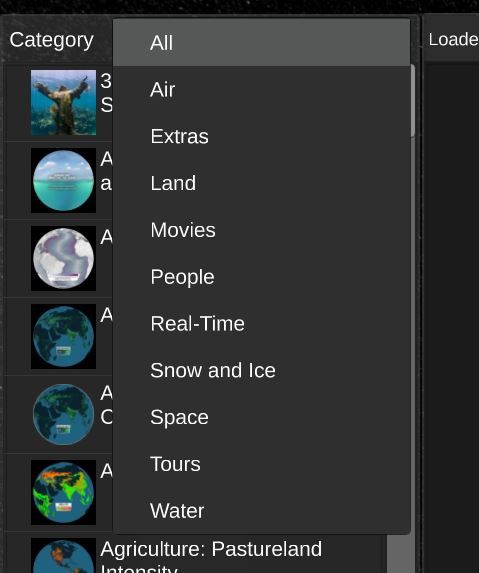
SOSx Dataset Categories
Information About the Dataset
Permalink to Information About the DatasetTo pop up a window with the dataset description, click the i above the X.
More Info Buttons
Permalink to More Info ButtonsFor some datasets, there are videos, website links, or images included to help you understand the concept. If these are included, press the button icons on the right side of the screen.
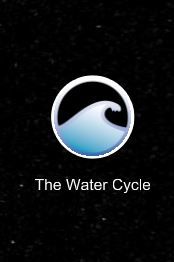
Example of the More Info button
Opacity Slider
Permalink to Opacity SliderThe opacity slider is a feature you can use when selecting any Dataset to see the underlying Basemap of the earth. By sliding right or left, you can see more of the current Dataset that is selected, or more of the Earth’s Basemap. You can find this feature to the right of the Dataset Menu.

Opacity Slider next to the Dataset list.
Buttons
Permalink to Buttons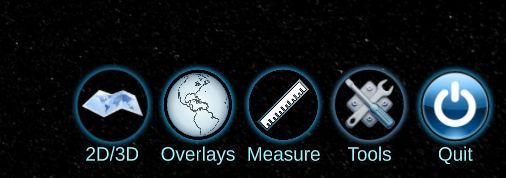
SOSx Menu Button
2D/3D
Permalink to 2D/3DThis allows you to switch between flat map and spherical map projection.
Overlays
Permalink to OverlaysThis brings options for geographical references to layer on top of any Earth dataset. For example, country borders or city names.
Measure
Permalink to MeasureThis tool allows you to measure distance on the globe with different popular units (i.e. feet, meters, kilometers…).
Quit
Permalink to QuitClicking this closes the application. If you checked the boxes in the installation that indicated you are using SOSx in a public exhibit, you may not have the Quit button. You can also remove this button by going to the SOSx Configurator.
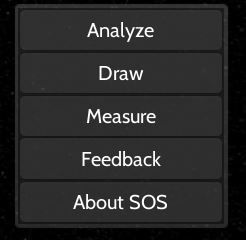
SOSx Tool Menu
Clicking Tools exposes options:
- Analyze
- Draw (draw on the sphere)
- Measure (same as above)
- Feedback (send us a comment so we can track your experience)
- About SOS (opens our website)
Analysis Tool
Permalink to Analysis ToolThere are three modes of analysis.
Probe - Allows you to click or touch the globe and get data values.
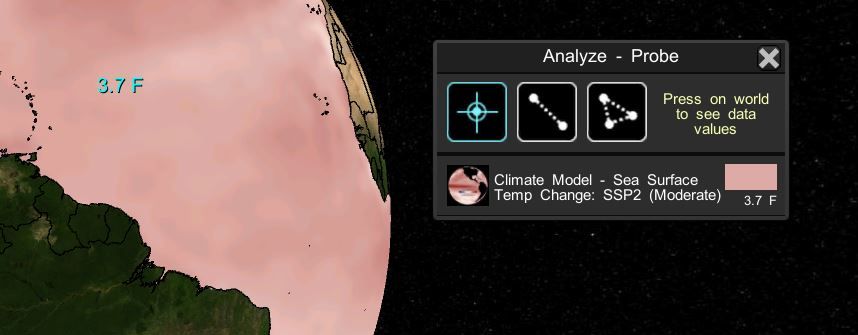
Analysis Tool - Probe
Transect - Allows you to draw a line and get data values in a line graph, which can also animate.
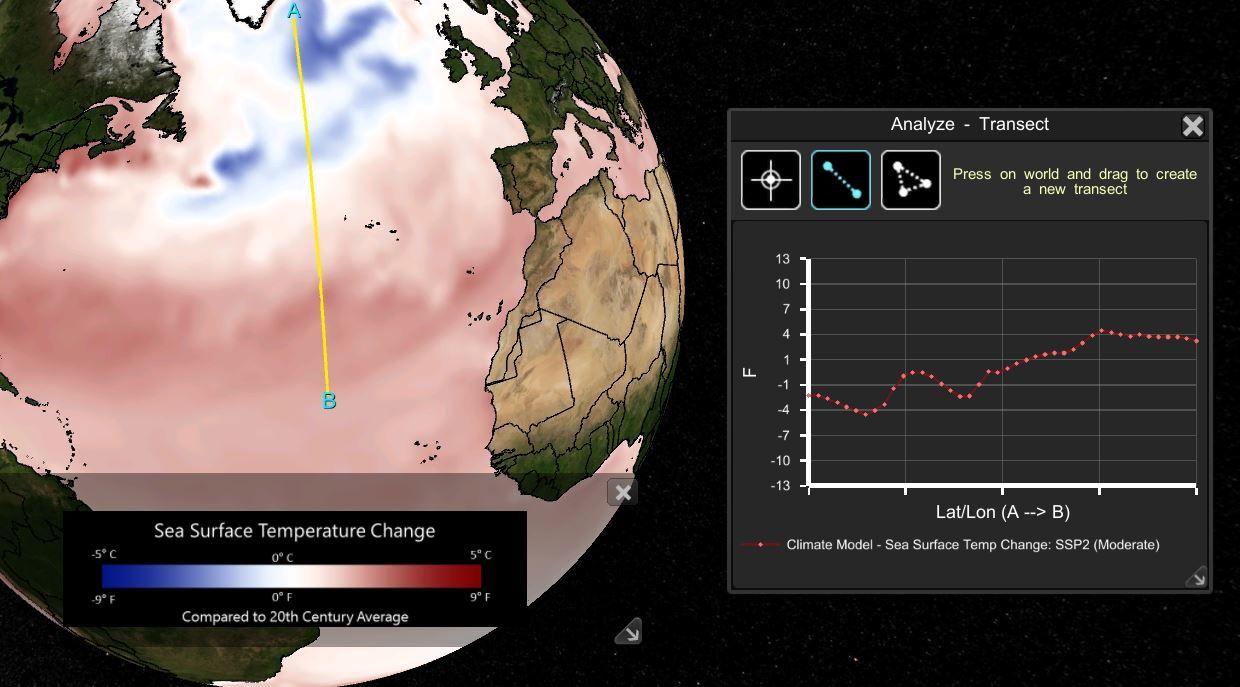
Analysis Tool - Transect
Average - Allows you to draw a triangle which computes the average for the data within.
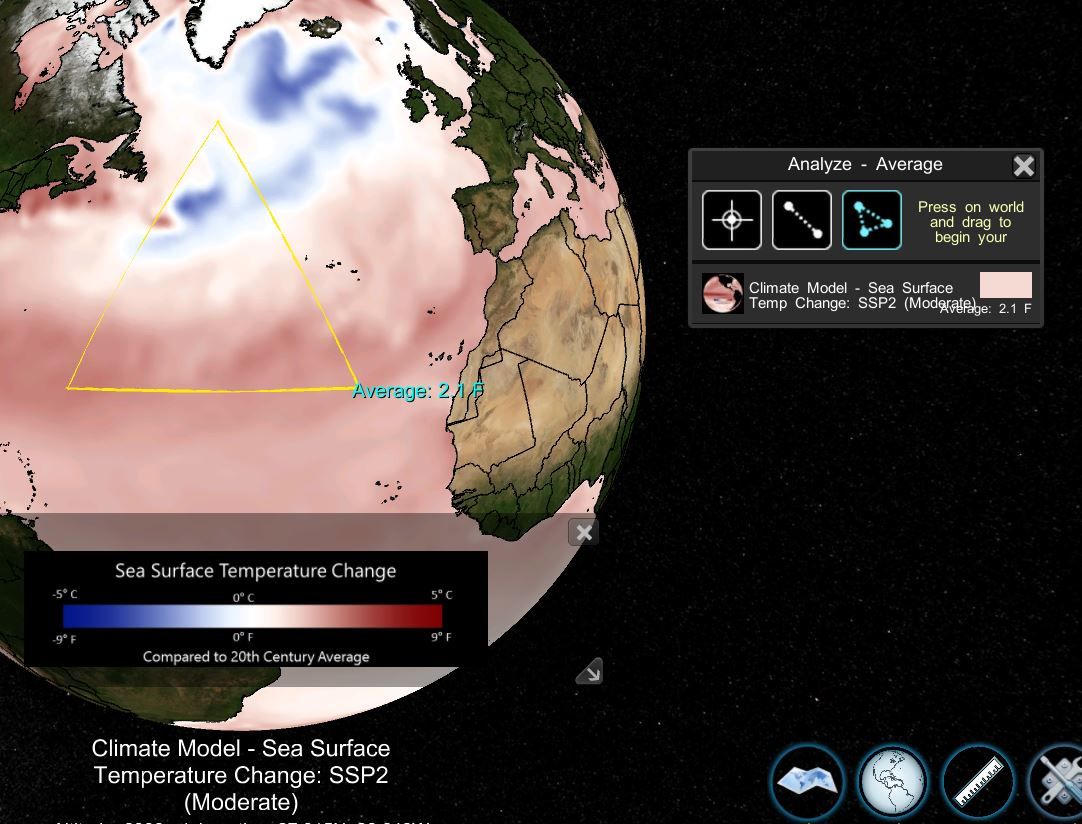
Analysis Tool - Average
Interacting with Datasets
Permalink to Interacting with DatasetsSOS Explorer® contains a subset of the NOAA Science On a Sphere catalog of datasets. There are a few different types of datasets and they play (and update) a little differently. To get a list of the datasets that are available for SOS Explorer® visit the SOS Dataset Catalog.
Globe Exploration
Permalink to Globe ExplorationDepending on your set-up, you can either use a mouse, trackpad, or touch screen to rotate the globe and pinch to zoom in as desired to explore the data.
Dataset Playback
Permalink to Dataset PlaybackAnimated Dataset Control
Permalink to Animated Dataset ControlAnimated data consists of a directory of images or a video that plays data often over time. With animated data, you can use the Animation Window controls in the upper right of the screen. In this window, scrub quickly through the animation using the slider bar, play and pause, move one frame at a time backward or forward with the single arrow buttons, go to the beginning and the end with the double arrow buttons. You can also change the Playback Speed (FPS) dropdown value.
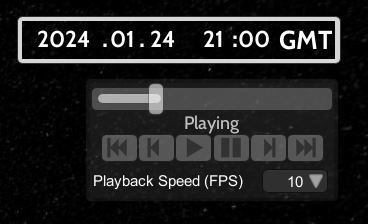
Animation Window
Dataset Types
Permalink to Dataset TypesThe full list of SOS Explorer® datasets included in a Complete Installation can be found on the Dataset Catalog with SOS Explorer® selected as the platform.
Single Images
Permalink to Single ImagesSingle images are datasets that are made of one image. You can rotate and zoom in on the globe. A great dataset example is Hurricane Tracks: Cumulative - 1950 - 2020.
Animated Data
Permalink to Animated DataAnimated data consists of a directory of images or a video that plays data often over time. With animated data, you can use the Animation Window controls in the upper right to move through or change the speed of the data. A great example of this is Atmospheric Chemistry: GEOS - 5 Model.
Real-time datasets
Permalink to Real-time datasetsReal-time datasets, when kept up to date, show near-real-time information by downloading new frames often. See below for instructions on keeping them up to date.
Narrated Movies
Permalink to Narrated MoviesNarrated movies are often not maps, but rather a movie with narration that wraps around the globe. These were made for Science On a Sphere, which is why they are spherical rather than flat videos, therefore, they aren’t necessarily ideal for the SOSx flat screen experience. However, they are wonderful movies that were made for SOS and so we decided to include them. A great example of this is Eating Water: Agriculture and Climate Change.
Tours
Permalink to ToursTours are listed in the dataset menu usually as “Tour - …” and are typically many datasets put together as a story. They include text, images, videos and other media to provide context to the datasets. A great example of this is Tour
Experiences, 360 Bubbles, 3D and More
Permalink to Experiences, 360 Bubbles, 3D and MoreWe also have a few datasets that are either more like a video game - we call these “Experiences,” where you might pilot an underwater rover or learn safety tips during a tornado. In addition, we have included Saturn with Rings as well as a 3D Aurora.
360 Media of National Marine Sanctuaries are bubbles that can be entered in order to experience a 360 degree underwater photo. And some of our finest expressions of 3D and real-time data combined are our Satellite Models and Satellite Positions. The majority of these only come with a Complete install, which will take up 165 GB of space on your computer.
Utilities Folder
Permalink to Utilities FolderSOSx Utilities Folder
Permalink to SOSx Utilities FolderWhen you first install SOSx, you will have two icons placed on your Desktop:
SOS Explorer® and SOSx Utilities. The first one launches SOSx and is pretty
straightforward, however the second one is a shortcut to a folder that holds
various useful shortcuts to apps that come bundled with SOSx.

SOSx Utilities icon.

SOSx Utilities folder contents.
Below you will find a reference to all the different shortcuts and their
functions.
Dataset Management
Permalink to Dataset ManagementAfter the initial installation, you might find that you want to add more
datasets that you didn’t select during the initial install, or perhaps remove
datasets that you aren’t using. To do this, you will need to open the SOSx
Dataset Management inside the SOSx Utilities folder.

SOSx Dataset Management icon.
Once you have opened the Dataset Management Application, you can select or
deselect the datasets that you would like to modify. After you are done, click
Next.
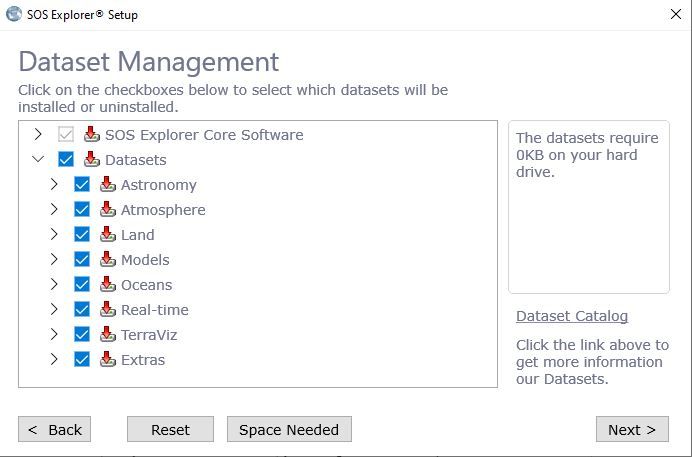
SOSx Dataset-Management
TourBuilder
Permalink to TourBuilder
SOSx TourBuilder icon.
The Tour builder is our bundled app that lets you create custom content for
SOSx sphere. You can find more information about this tool, including what a
tour is and how to create one, here.
SOSx Configurator
Permalink to SOSx Configurator
SOSx Configurator Icon.
This bundled app lets you modify and configure many of the aspects of the SOSx
application. You can find a detailed description of each of the settings
here.
SOSx Updater
Permalink to SOSx UpdaterThe SOSx Updater delivers updates to the SOSx software, its bundled apps, and
releases of new datasets. When you restart your computer you will get
notifications when new versions of SOSx are available. However, you may also
check for updates manually by following the steps below.

SOSx Updater Icon.
Double-click the SOSx Updater. If no update is available, there
will be a pop-up that says No Update Available. Click to close.
When a new software update is available, click Next to
download the new update. After the download completes, the software Installer
pops out. Continue clicking Next to complete the
installation.
Real-time Dataset Syncing
Permalink to Real-time Dataset Syncing
SOS Real-time Dataset Sync icon.
If you select in the initial installation, to sync real-time datasets, you
will get automatic updates. When enabled, it will run every Tuesday, Weekly,
at 9am local time if your computer is on and connected to the Internet. If you
unchecked that box, double-click the SOSx Utility, then double-
click the SOSx Real-time Dataset Sync to open a sync script WinSCP
window. It will be minimized by default and will close when finished.
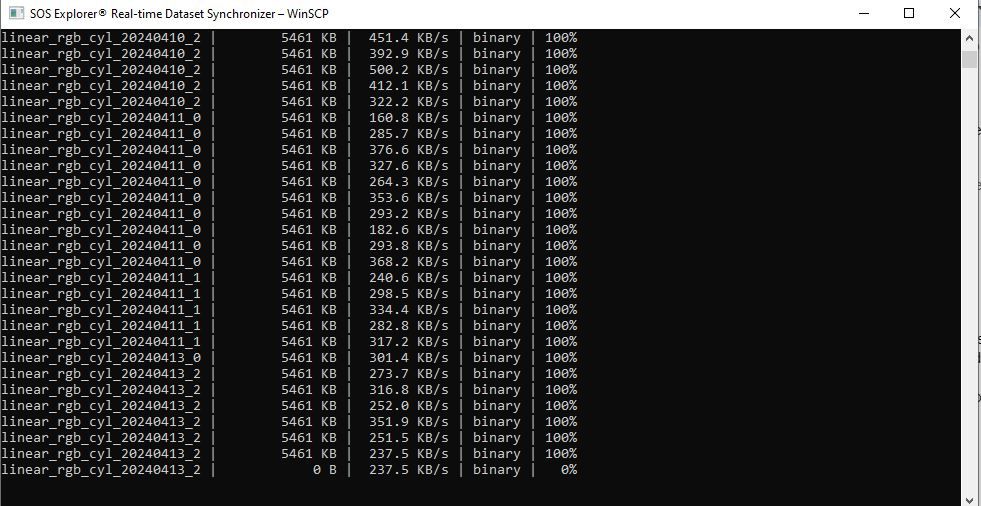
Script Window
SOSx Local-Datasets
Permalink to SOSx Local-DatasetsThis is a shortcut to your local-datasets folder which is located
in your installation directory. This is the folder that contains all your
datasets and tours, including the ones you installed, any real-time updates,
and custom datasets that you create.
SOSx Repair
Permalink to SOSx RepairThis shortcut launches the repair process of the SOSx software. It is similar
to a reinstallation. We only recommend you use this if you are facing trouble
with your installation, like SOSx or any of the bundled software not opening
or working properly.
SOSx Uninstaller
Permalink to SOSx UninstallerThis icon uninstalls the SOS Explorer software from your computer. You can find
a video tutorial here and a step-by-step guide
here.
SOSx Configuration
Permalink to SOSx ConfigurationSOS Explorer® has many options for customizing your installation, from the number of displays, to the timing of data syncs, to whether or not you want to show an exit button (for use in classrooms, for example, it’s great to have the quit button right on the screen, not so for public exhibit spaces). In order to change the configuration of your installation, we have created a “Configuration” program, which edits a file called config.json for SOS Explorer®.
SOSx Configuration
Permalink to SOSx ConfigurationYou can open the SOSx Configuration app by going to the Utilities folder that is placed on your desktop.
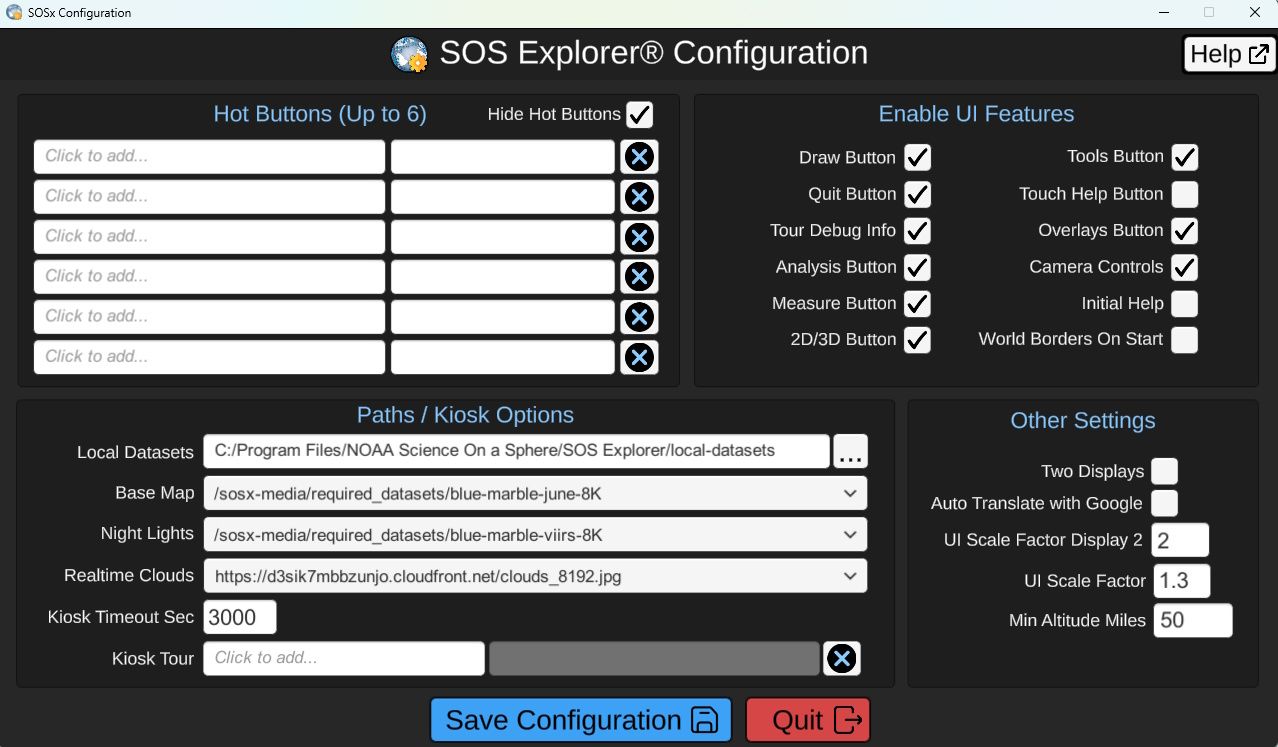
SOSx Configuration window
Configuration allows you to customize the SOSx interface, including:
- Selecting which Hot Buttons (shortcuts) appear in the lower-left corner
- Choosing basemap and cloud display options
- Linking a kiosk tour that plays automatically after a period of inactivity (Kiosk Timeout Sec)
- Enabling or hiding various UI features (e.g., the 2D/3D toggle in the lower-right corner)
- Setting display options, such as activating a second monitor
If you choose all the default options during the installation, you will find
the configuration file at:
C:\Program Files\NOAA Science on a Sphere\SOS Explorer\SOSx_Data\config\config.json
Available Settings
Permalink to Available SettingsEnable UI Features
Permalink to Enable UI Features-
2D/3D Button: Allows users to switch between 2D map and 3D globe mode.
-
Analysis Button: Allows users to probe and analyze datasets, and display graphs. This falls under “Tools” in the application.
-
Camera Controls: Displays camera controls which allow the user to tilt and rotate the camera (pitch and roll).
-
Draw Button: Allows users to open a window to draw lines and place icons on the globe.
-
Measure Button: Allows users to measure distances on the globe. This falls under “Tools” in the application.
-
Overlay Button: Allows users to display overlays on the globe such as country borders, cities, and grid lines.
-
Quit Button: Allows users to exit the application by pressing a quit button on the lower-right. Not recommended for public exhibits but preferred for classroom use.
-
Tools Button: Shows a menu with a variety of resources. It might be hidden under certain datasets if it’s not supported.
-
World Borders on Start: When checked, displays country borders when the application is started, when unchecked it instead displays the globe without borders. Default is unchecked. You can always turn on country borders to assist with geography knowledge in the application by pressing or clicking “overlays.”
Paths / Kiosk Options
Permalink to Paths / Kiosk Options-
Base Map: The directory where the chosen Earth basemap is installed. This is typically either an 8K or 80K version of NASA’s Blue Marble.
-
Kiosk Timeout Seconds: The number of seconds before the automatic kiosk tour will run when there is no activity. Default is 420 or 7 minutes.
-
Kiosk Tour: The dataset ID of the tour to run when the installation is left without any touch or click activity. This is only recommended in public exhibit settings.
-
Language: The language that should be used for display. Typically this should remain the default unless you want to override the system settings.
-
Local Datasets: The location where the datasets are installed.
-
Night Time Lights: The directory where the chosen Earth night time lights dataset is installed. This is typically either an 8K or 80K version of NASA’s Black Marble.
- Real-Time Clouds: The URL where the most recent version of clouds are located. This is typically either a 4K or 8K black and white equidistant projected cloud image.
Other Settings
Permalink to Other Settings-
Min Altitude Miles: How close to allow the view point to get to the Earth.
-
Two Displays: The number of displays to show SOS Explorer® on. Checking the box means there are two displays, otherwise there is one. If this is checked, make sure both displays are on or you may lose some UI elements.
-
UI Scale Factor: A percentage to scale the UI elements on the main display. A value of 1 is the original size, but touch-screen users may prefer larger values such as 1.75. Default is 1.75. You may have to play with this a little to get the desired sizes of UI elements.
-
UI Scale Factor Display 2: A percentage to scale the UI elements on the secondary display. A value of 1 is the original size. Default is 1.75. You may have to play with this a little to get the desired sizes of UI elements.
config.json
Permalink to config.jsonThe config.json file is the file that saves the configuration data that you
selected while using the SOSx Configurator app. Some of the options cannot be
changed via the SOSx configurator app and need to be edited manually by going
to the file itself. These options are shown below. You can find the
config.json file by going to
[Install Directory]/SOS Explorer/SOS Explorer/SOSx_Data/config/config.json.
-
enableFullFTPSyncOnStart:
trueto launch a full data synchronization process every time SOSx is started. This may impact system performance. The default isfalse. -
enableRealtimeFTPSyncOnIdle:
trueto synchronize the latest real-time datasets when there is no activity. The default istrue. When set tofalse, the real-time datasets do not sync. -
hideCountries: A string array of country names that should not appear in the corresponding overlay.
-
refreshLocalDatasetsSec: The number of seconds to wait between real-time datasets syncing when the machine is idle. The default is
1800.
How to Check the Application Version Number
Permalink to How to Check the Application Version NumberStep 1: Click the Settings button in the Start Menu.
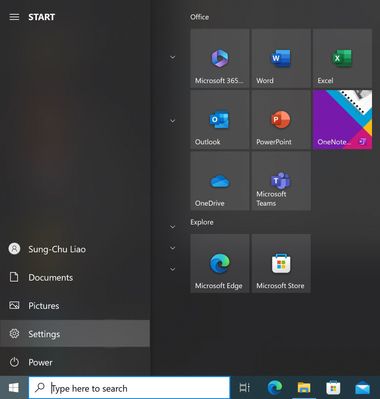
Settings button in the Start Menu
Step 2. Click the Apps button in the Settings Menu.
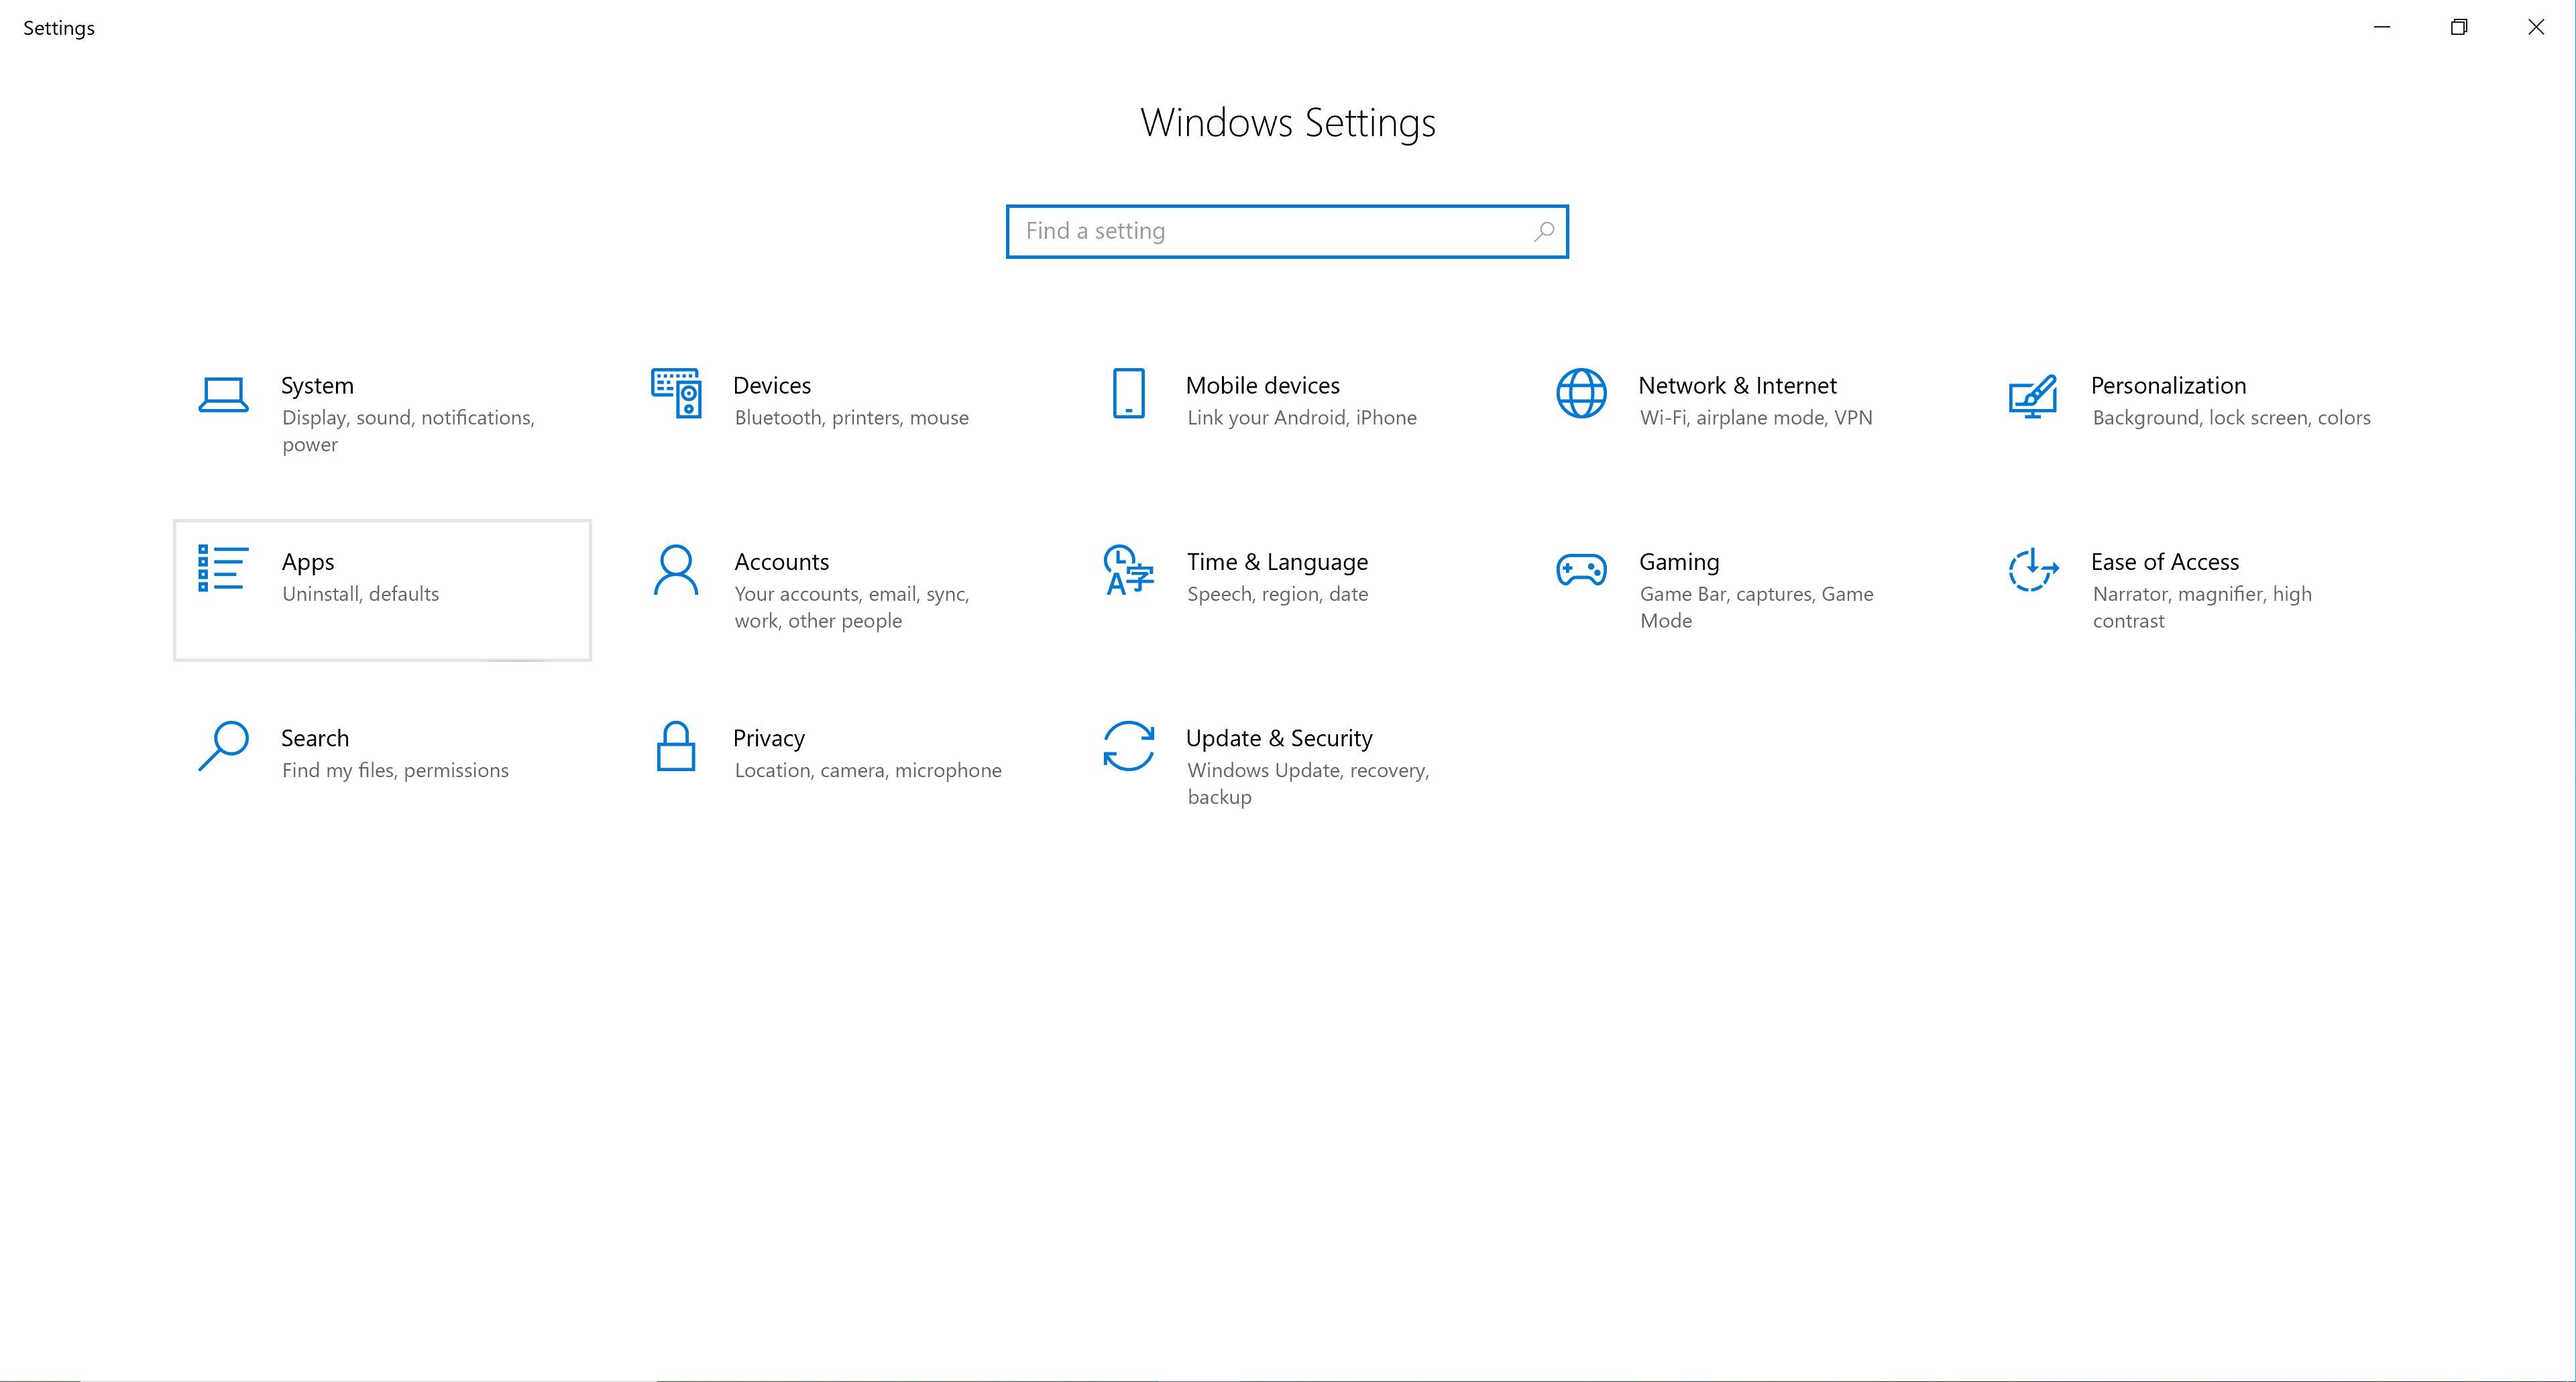
Apps button in the Settings menu
Step 3. Scroll down and locate SOS Explorer® to view the application version number.
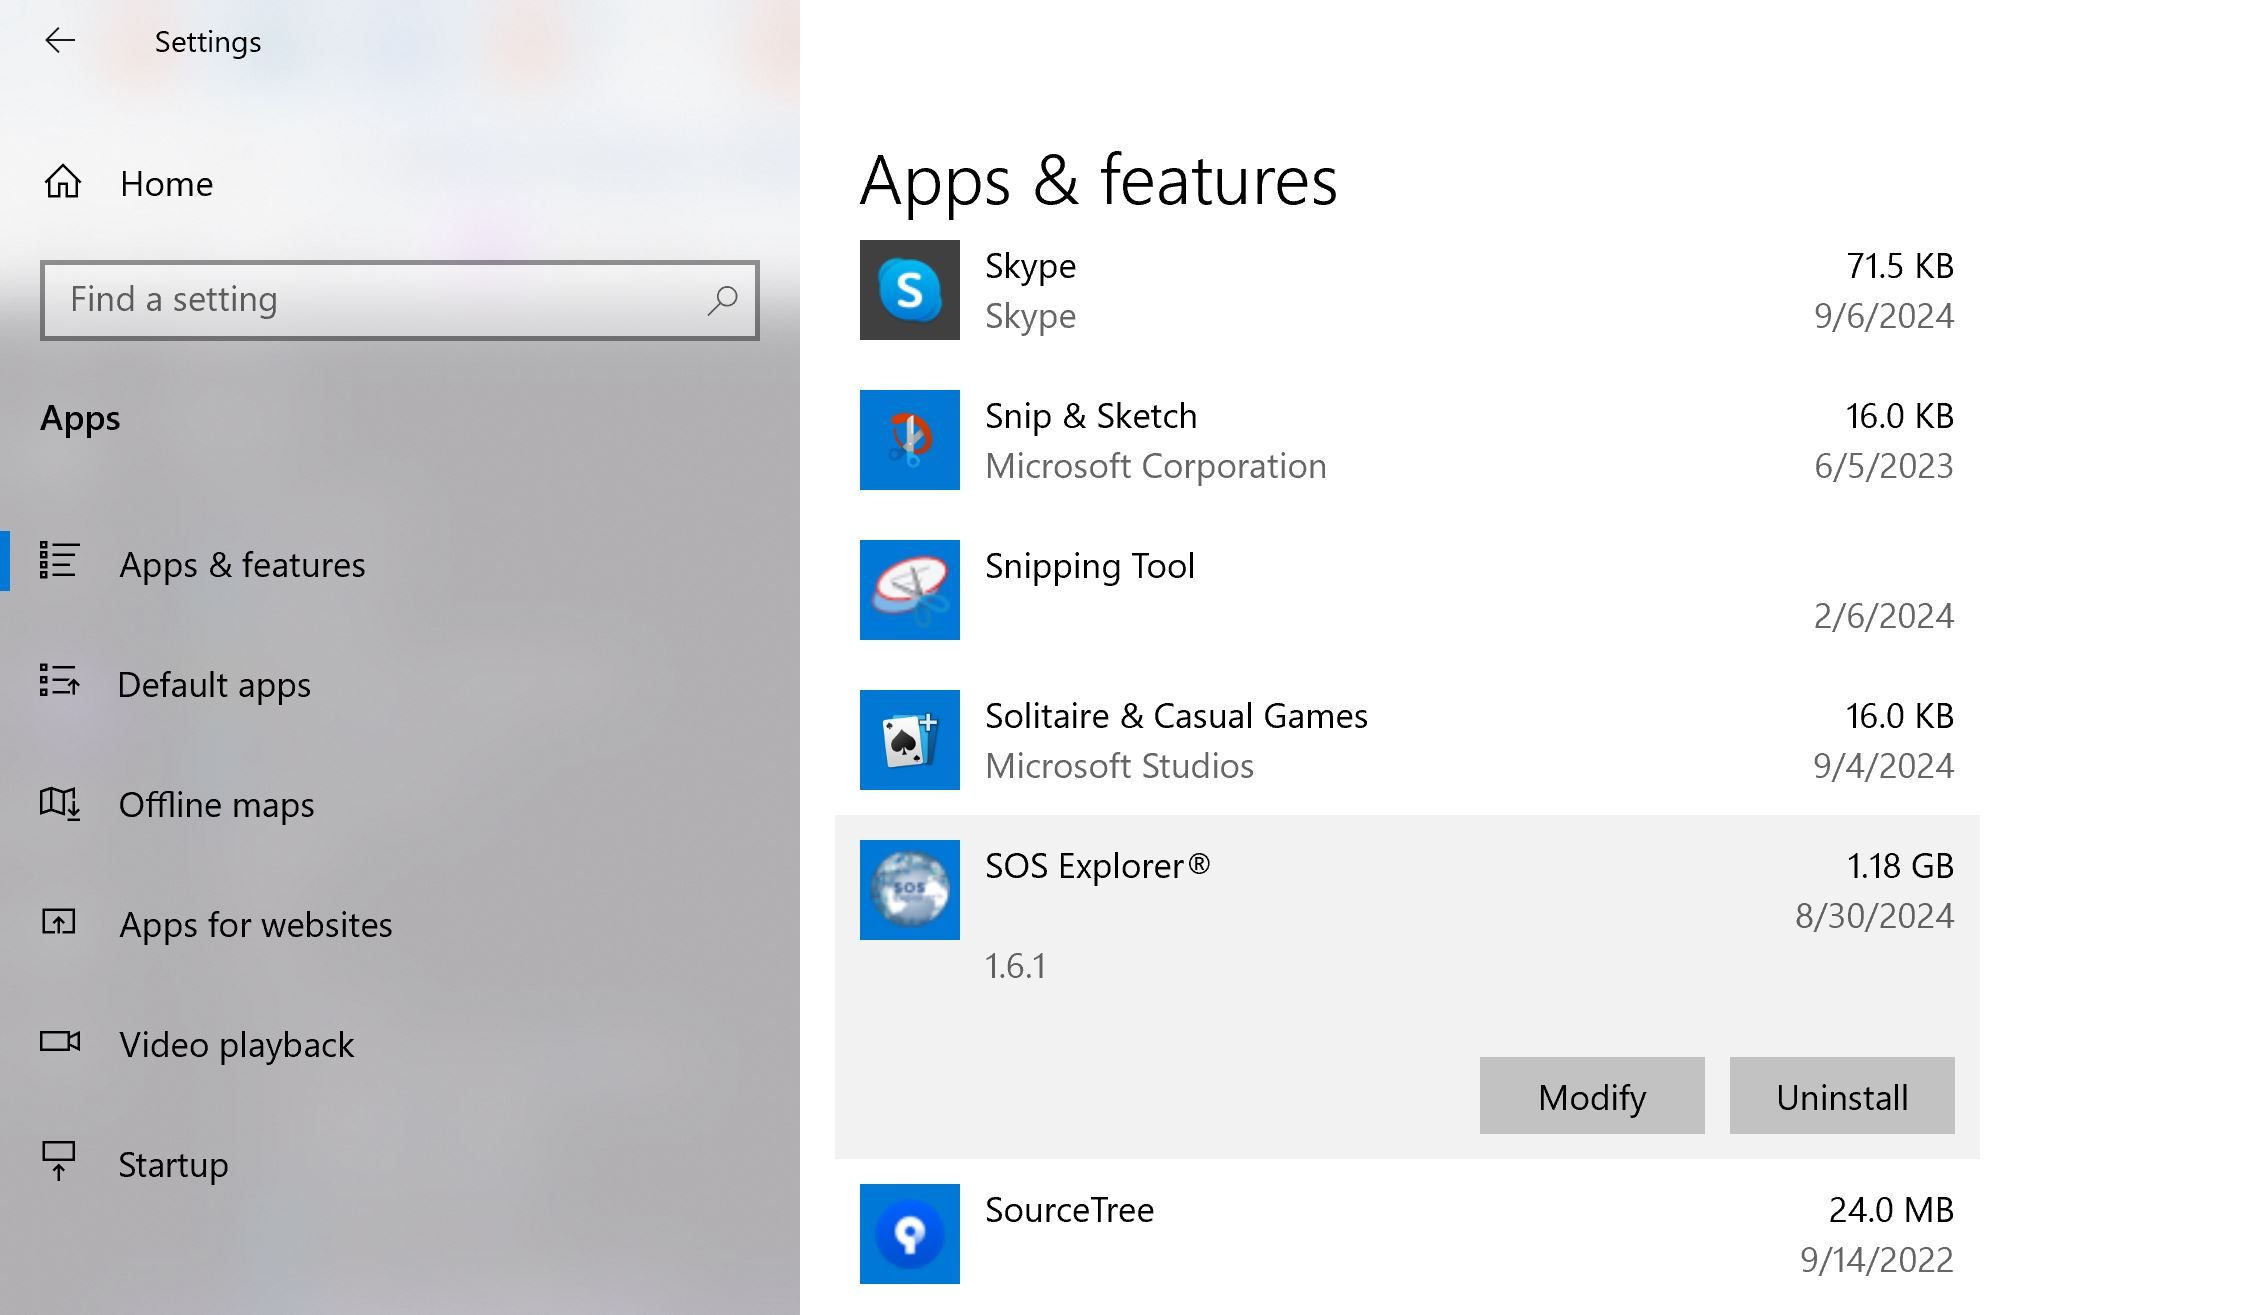
The SOS Explorer® app showing the application version number
Contact Us
Permalink to Contact UsIf you encounter a bug or want to share feedback about the software, please go to Tools > Feedback and fill out the form in SOS Explorer.
You can also send the feedback to us using this link: SOS Explorer Feedback Form