Tours and TourBuilder
Introduction to Tours
Permalink to Introduction to ToursSOSx datasets can be very complex. We invented “Tours” in order to tell a story with datasets and to help your audience make tangible, understandable connections between the animations and their lives or to simply play a list of datasets in a specified order while your exhibit is idle (Kiosk Timeout Tour). Tours are often used in public interactive exhibits but could also be used in an educational setting.
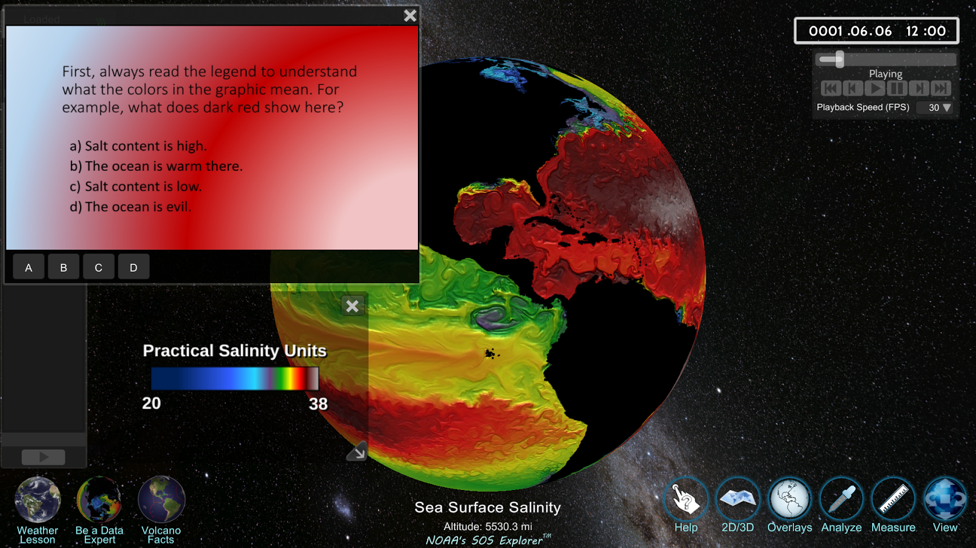
A quiz question in an SOSx called “Be a Data Expert” tour increases interactivity and engagement.
Tours can be scripted presentations that walk a user through the datasets using a storyline and a learning goal. These often include text, guiding questions, pop-up web content, videos, pictures/diagrams, and click-able place marks. To see a few examples used for education go to our SOSx Tours page.
Using TourBuilder, you can build your own tours! Once built, your tours will show up in your search window (if desired).
Accessing Tours
Permalink to Accessing ToursTours can be launched three ways:
- Hot Buttons, when programmed, show up on the lower left corner of the touchscreen and are linked to the tours. When clicked, Hot Buttons launch right into a tour
- Tours are all named “Tour - Weather Lesson” (for example) in order for them all to show up under the letter T in the alphabetical search window
- Tours are tagged as Category “Tours” (chosen in Tour Builder) in order for them to show up in the “Tours” dropdown category when browsing
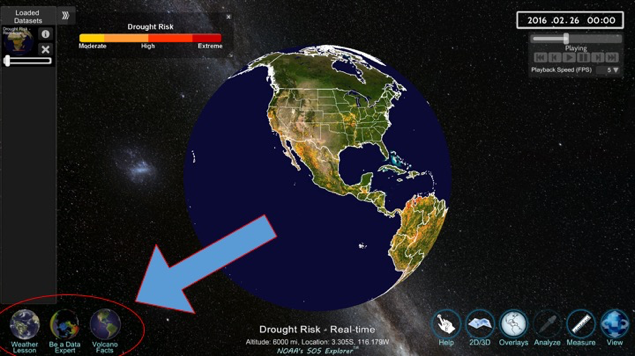
Hot buttons can be made to show up in the left bottom corner of the screen and launch your favorite tours or datasets.
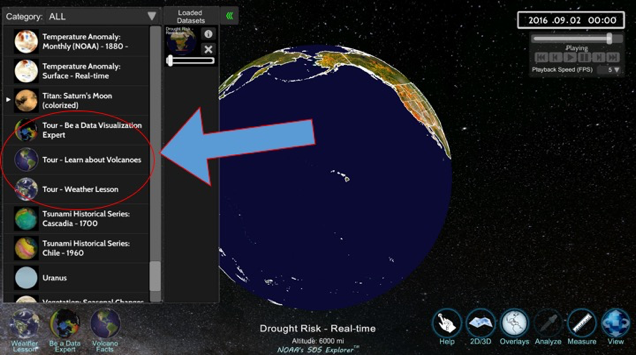
This image highlights the naming protocol: all tours are prefixed with the word “Tour”
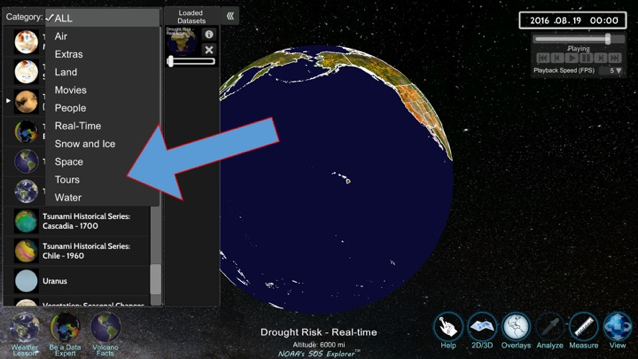
By selecting the category “Tours” you will isolate the window with only tours.
Tour Builder Application
Permalink to Tour Builder ApplicationLaunch Tour Builder by clicking SOSx Utilities then clicking Tour Builder. Tour Builder arranges tasks in a timeline. Each Tour Task is added to the main Timeline and runs in order. See the Tour Tasks Reference Guide below to make your tour.
Tour Builder Configuration
Permalink to Tour Builder ConfigurationIf your Tour Builder is not correctly configured to access your local-datasets folder, to File > Tour Builder Configuration and Browse to the local-datasets directory where your SOSx datasets live. Keep the Tour Audience set to “SOSx”.
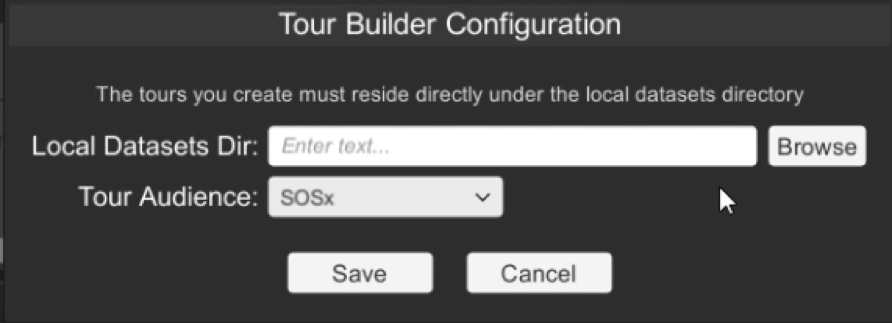
Tour Builder Configuration dialog window is used to find your local-datasets directory.
Datasets
Permalink to DatasetsSOSx datasets appear in the search window on the left side of SOSx. A dataset can be a series of images wrapped around the globe, a KML file, a satellite orbiting the Earth, etc. Users can choose a dataset category and select a dataset to load.
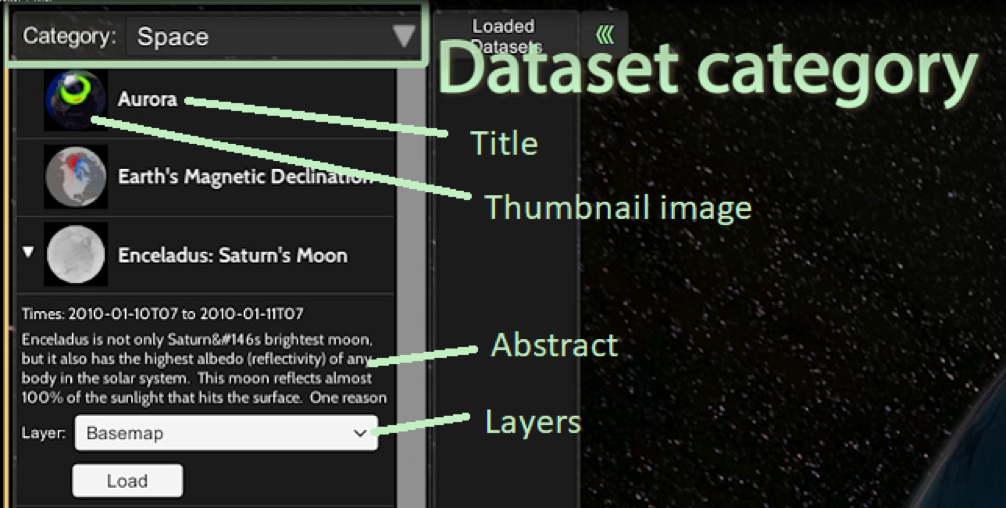
Datasets have a category, a thumbnail, and a title.
Dataset Editor
Permalink to Dataset EditorTour Builder enables you to create your own datasets. From the Tools menu, you can create a new dataset or open/edit an existing one. Go to the Dataset (Content) Creation Guidelines to make a new dataset for your SOS Explorer.
If the dataset is a series of images, set the start time and end time to match your image files, like the example seen here. The Aurora dataset is a series of .dds images that run from Sept 30, 2012 at noon until October 1, 2012 at 11:35 am.
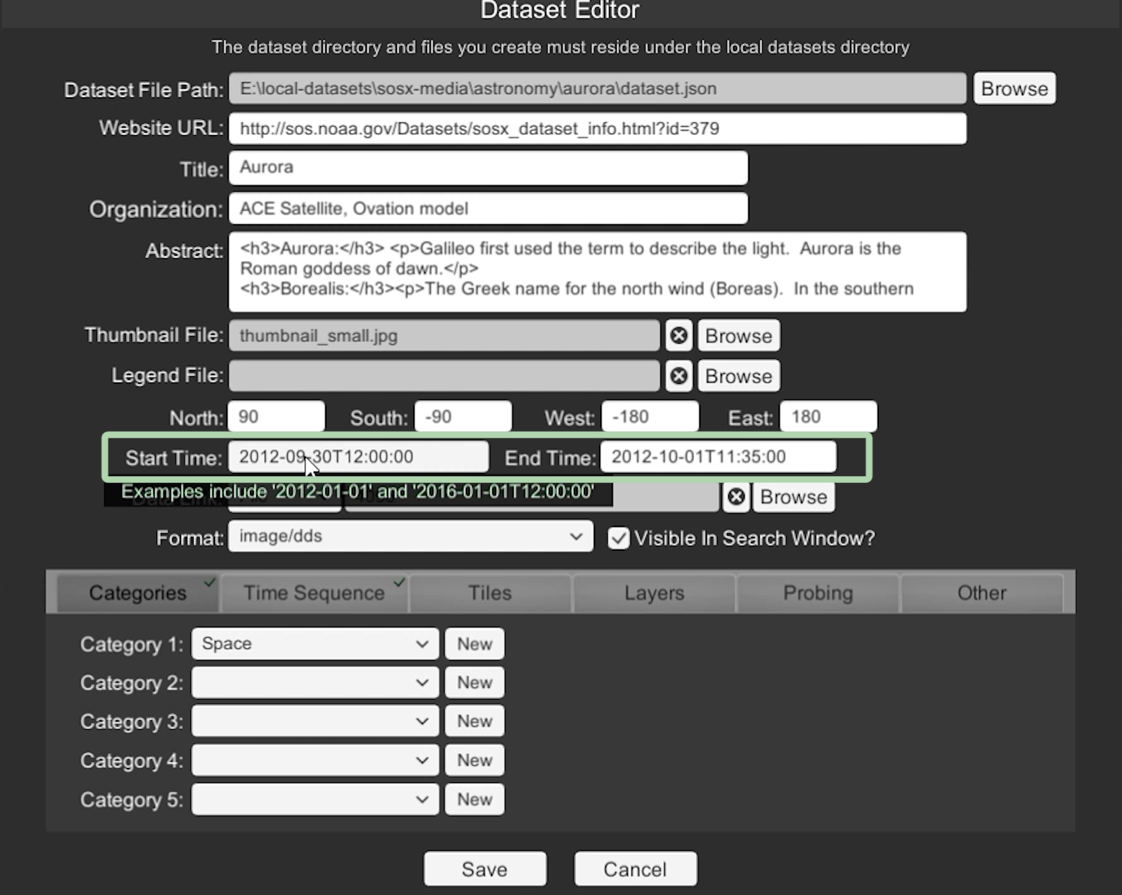
Dataset Editor allows you to add or edit new datasets.
The image Format can be png or jpg for a single-image dataset. If you have more than one image, it should be in .dds format. are not already in dds format, go to ToolsDDS Converter to convert your .png or .jpg images into .dds format.
For detailed information about creating a dataset, you may find the tutorial video entitled Tour Builder: Introduction to DatasetEditor helpful.
Create a New Tour
Permalink to Create a New TourA tour is a list of “tasks” to perform, in sequence. For example, a tour might turn off clouds, turn on world borders, load an aurora dataset, then display a text box with information about auroras. That could be a complete, but simple, tour.
To create a new tour in Tour Builder, go to the FileNew Tour. You will be prompted for the directory for your new tour. Tour Builder will default to the <local-datasets>/custom directory. Click the Create Directory button to create a directory for your new tour.
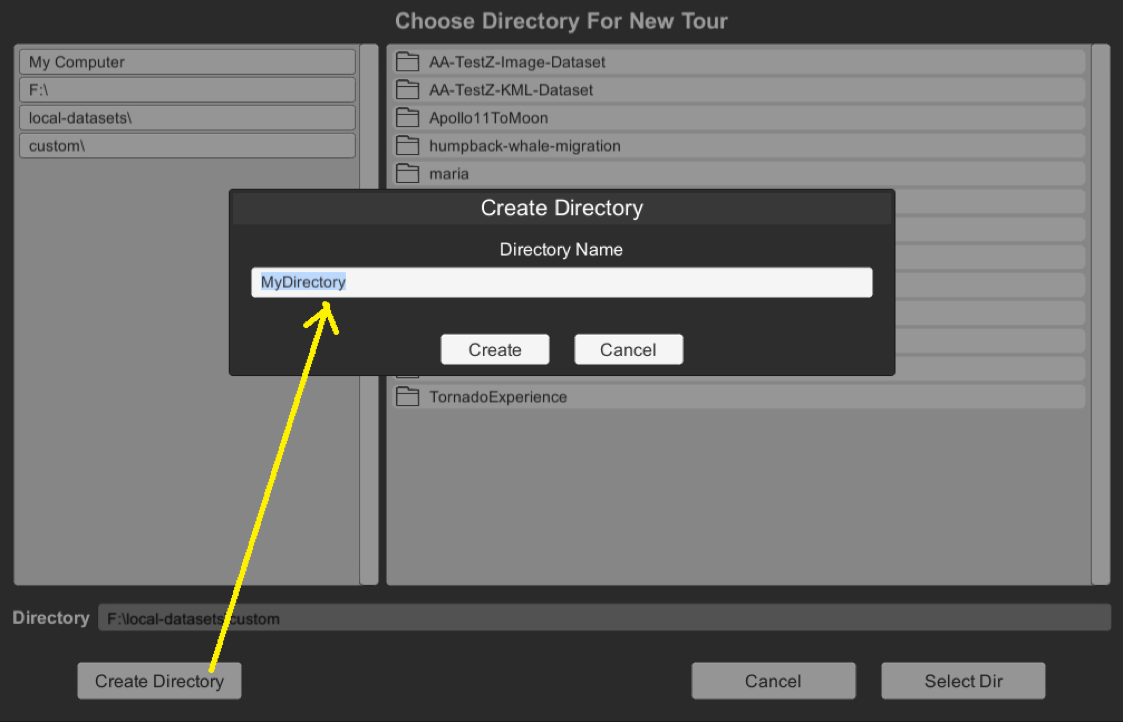
The Create Directory dialog window in Tour Builder
Next, you will be prompted to provide other information (metadata) about your tour.
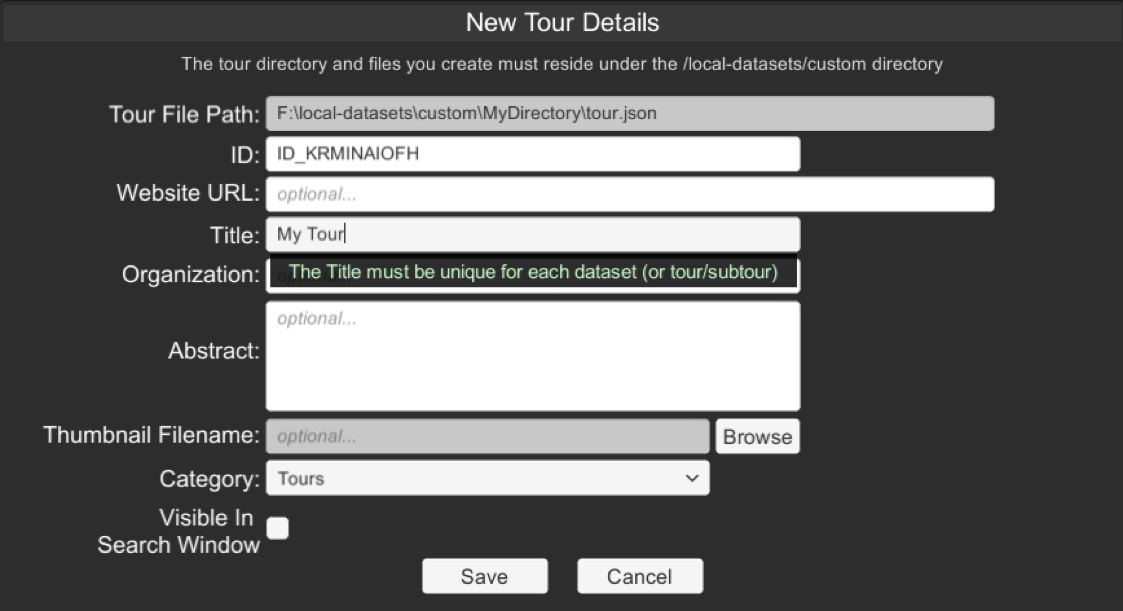
New Tour Details dialog window in Tour Builder
You must provide a Category and a Title. The other fields are optional but recommended. You can return to this window later on by selecting FileEdit Tour Details.
Once your tour is created, you can drag tasks from the top horizontal bar onto the “main tour timeline”.
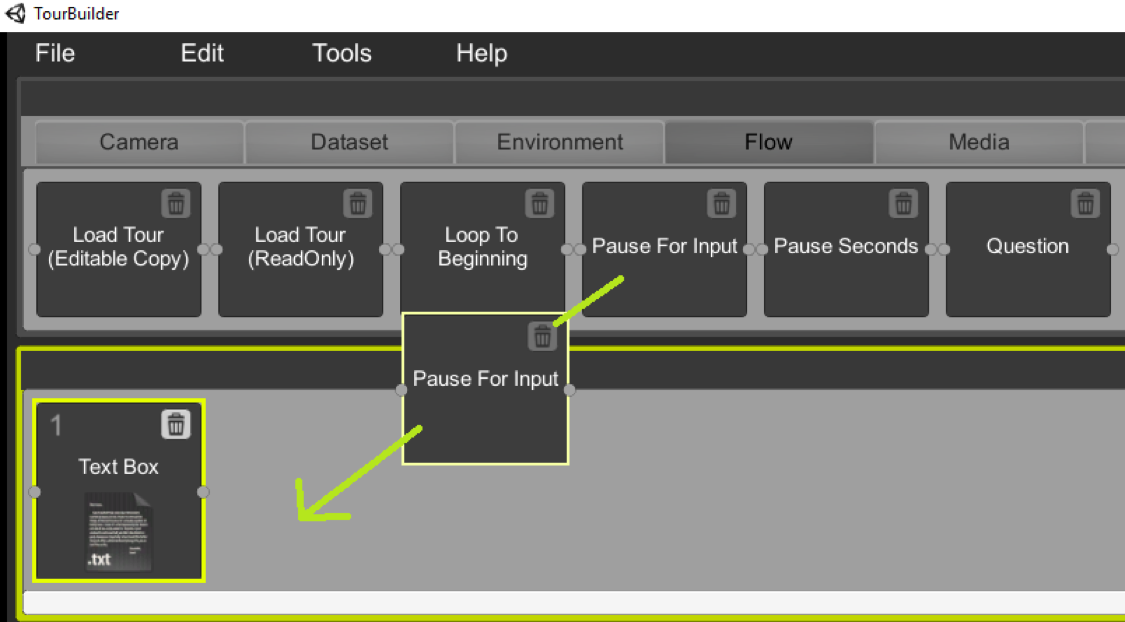
Tasks are added to a tour by dragging them onto the main tour timeline. In this example, the Pause for Input task is being dragged onto the tour’s timeline
A complete list of the tasks and an explanation of each can be found on the Tour Task Reference.
Once tasks are on the timeline, you can drag them around to reorder them. To delete a task from the timeline, click the little trash can icon.
You can organize a big tour into smaller “sub tours”. For example, perhaps you have 5 tour tasks that you always want at the start of any tour you create. You could create this 5 task tour in Tour Builder, save it, and then whenever you create a new tour, just include this 5 task tour with a single Load Tour (ReadOnly) task.
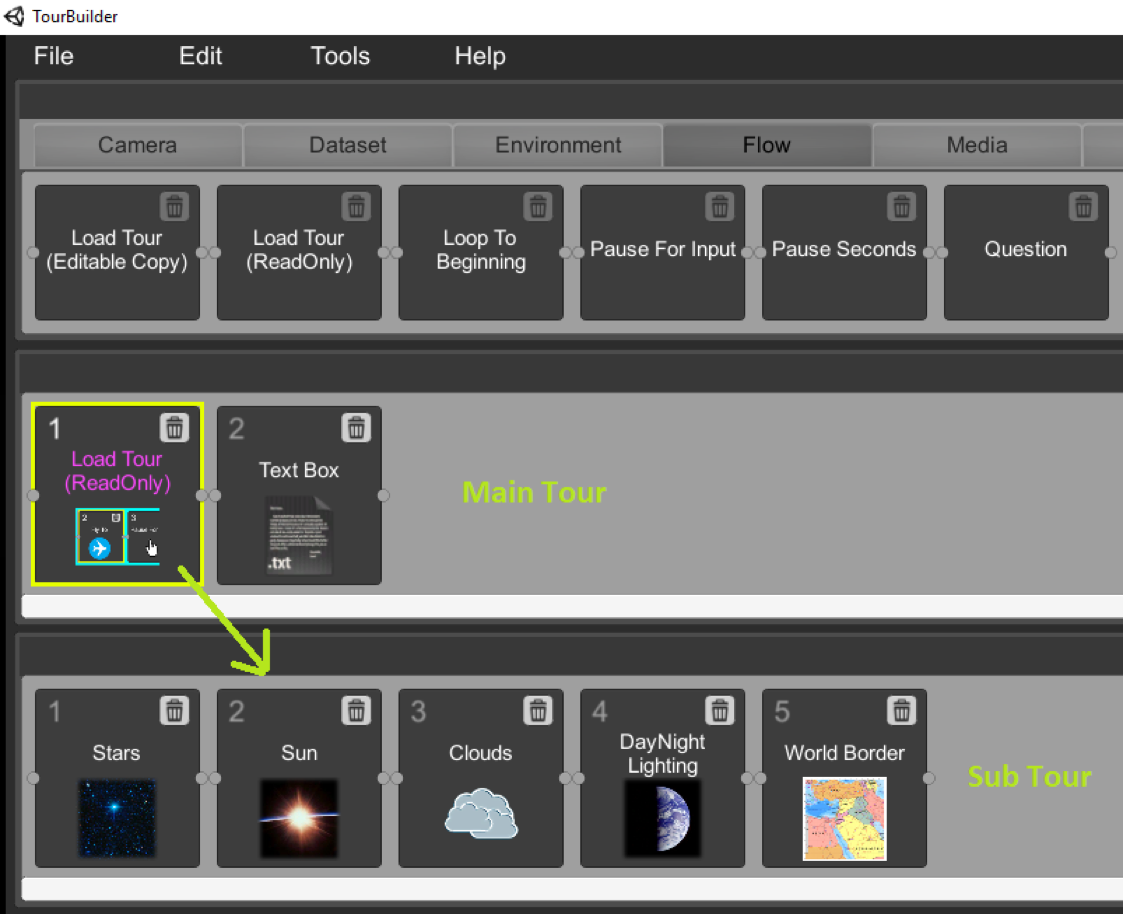
Tours can be embedded inside of other tours using the Load Tour (ReadOnly) task
Some tasks, such as Text Box, require you to provide additional information below. Just fill out the pertinent information. For example, to show a text box with the caption “My new tour!”, enter the following:
- Text Box ID: textbox1
- Caption: My new tour!
- CaptionPos: Center
- CaptionBestFit: True
- FontSize: 20
- FontColor: white
- IsClosable: False
- X Position (%): 50
- Y Position (%): 50
- Width(%): 40
- Height (%): 30
- ShowBorder: True
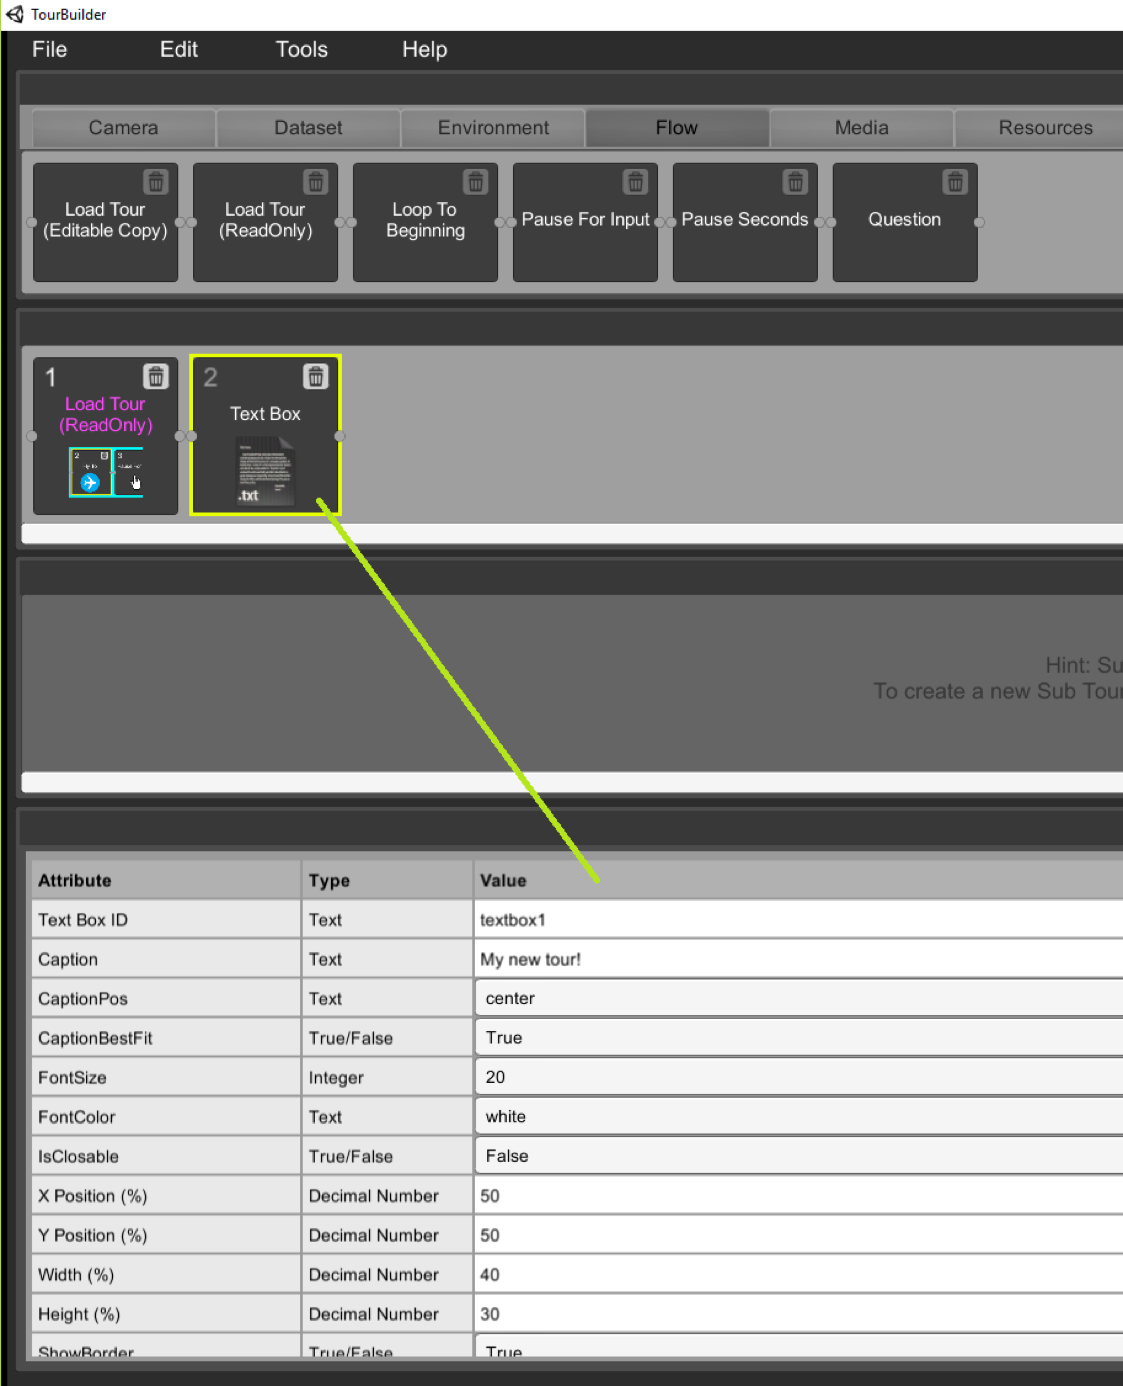
Example TextBox task that displays the text “My new tour!”
Play Your Tour in SOSx
Permalink to Play Your Tour in SOSxTo play your tour in SOSx, go to FilePlay From Start or FilePlay From Task #. You would choose the latter option, for example, if your tour has 100 tasks and you want to test tasks starting at task 80 and beyond (without having to go through all 100 tasks in SOSx).
You’ll see a window reminding you to launch SOSx.
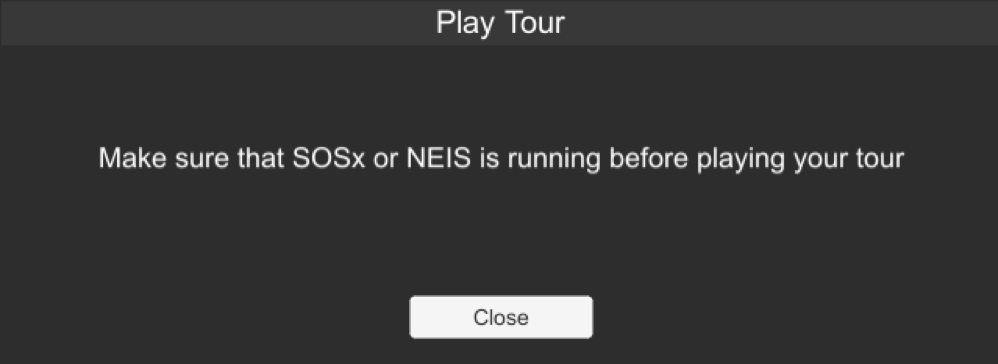
The Play Tour dialog window reminds you that SOSx must be launched in order to preview a tour in Tour Builder.
When you click the Close button (and if SOSx is running on your computer), your tour will immediately run. This is a helpful feature when you are working on a tour and want to test your progress.
Additional Information
Permalink to Additional InformationSelect HelpManual and Tutorials for additional information about running Tour Builder.
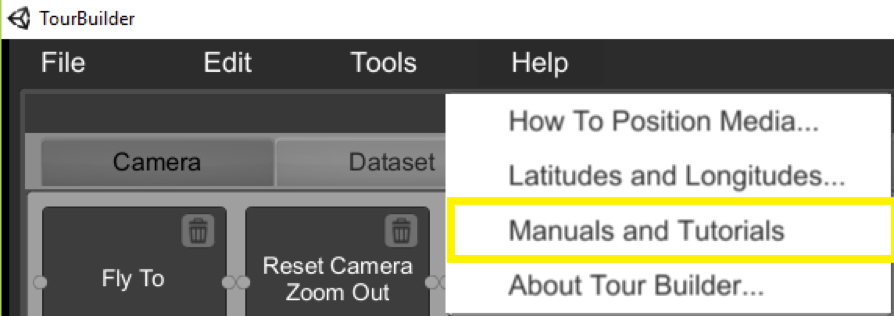
Manuals and tutorials for Tour Builder can be accessed from the Help menu