Making Image Backgrounds Transparent
To make the map layers’ backgrounds transparent, you need image editing software. This tutorial will cover how to do so with GIMP, which is an open source image editor and can be used on either Windows or Linux. If you have access to Adobe Photoshop, that works too.
Download GIMP from the project website. Follow the instruction in the setup wizard. When you open it (you can do so by going to the start menu and searching for it) it won’t be full screen. If you want to set the transparency of one image, this is all you need, but if you want to batch process a bunch of images (we do), you’ll need to install the plugin BIMP as well.
Installing BIMP for Batch Processing
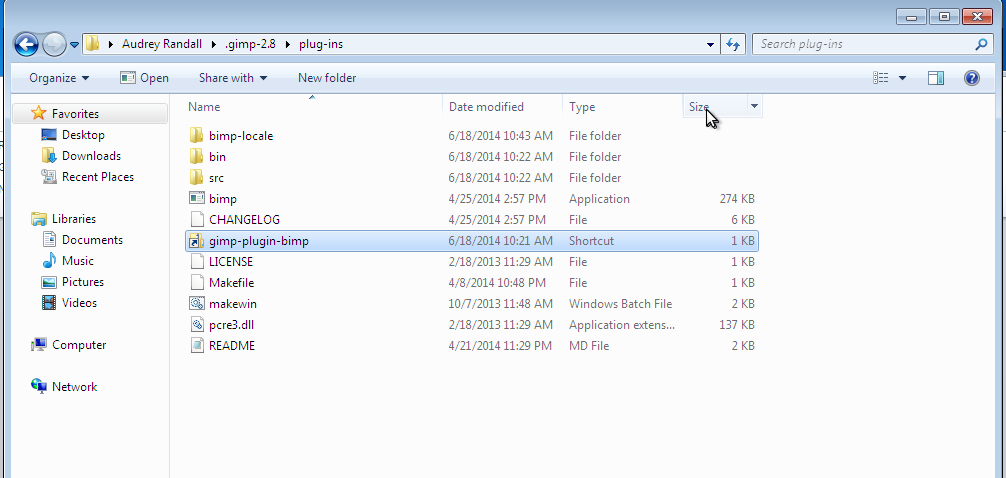
Permalink to Installing BIMP for Batch ProcessingDownload BIMP from the project website. Once you’ve downloaded the file, you’ll end up with a zip file in your Downloads folder, which you’ll need to extract into GIMP’s plugins folder. To do so, right-click the BIMP zip file, select Extract all, and in the box that says Files will be extracted into this location, browse until you find GIMP’s plugins folder. In Windows, that should be found at the file path C:\Users\your_user_name_here.gimp-2.8/plugins. So to find it, go to the folder Computer, then Disk C: (your local hard drive), the folder Users, then the folder with the same name as your username, then to the folder labeled gimp 2.8, then the folder called plugins. Select the plugins folder and click OK. Once you’ve done that, open the plugins folder by going to the Start menu, clicking on Computer, and following the file path above. Once you’re in the plugins folder, go to bin\win32 and copy everything in win32. Paste it back into the main plugins folder. Your plugins folder should now look like this:

After installing the BIMP plugin your GIMP plugins folder should look something like this.
Removing the White Background From Your Images
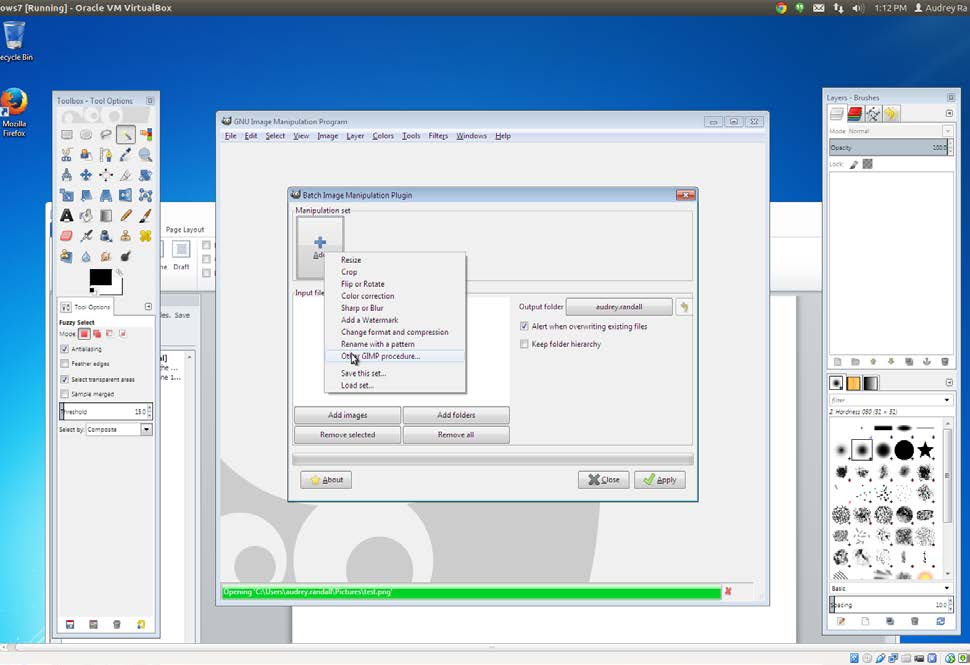
Permalink to Removing the White Background From Your ImagesNow, open GIMP. When you click File, you should see the option Batch Image Manipulation. Click on it. In the Manipulation Set box, click the Add icon to add a new transformation. A menu will appear; select Other Gimp Procedure….

Select Other GIMP Procedure… in BIMP to remove the white background from your images.
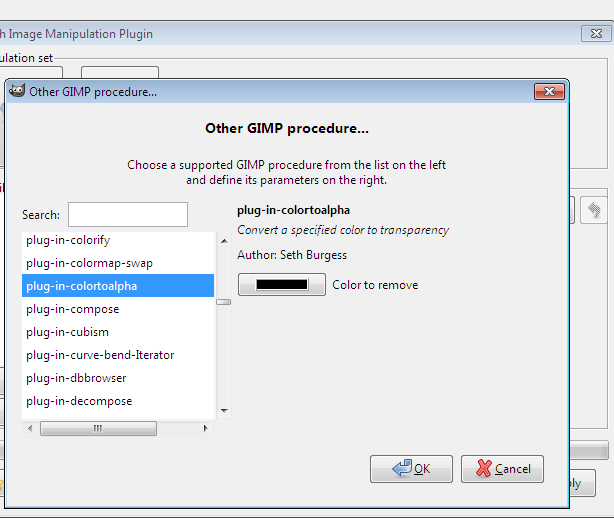
Select plug-in-colortoalpha in the list of available procedures, then click on the Color to remove button. In the color picker window that opens up, set the Color name to #FFFFFF (this is the hexadecimal code for the color white). Click OK in the Pick a Color window and the Other GIMP procedure… window. This should return you to the Batch Image Manipulation Plugin window.

Use GIMP’s color-to-alpha plugin to convert white pixels to transparent pixels in your images.
In the original Batch Image Manipulation Plugin window, click Add images. This is not the same button as the Add button you just used to pick the color to remove from your images. Select the images you want to manipulate and click Add.
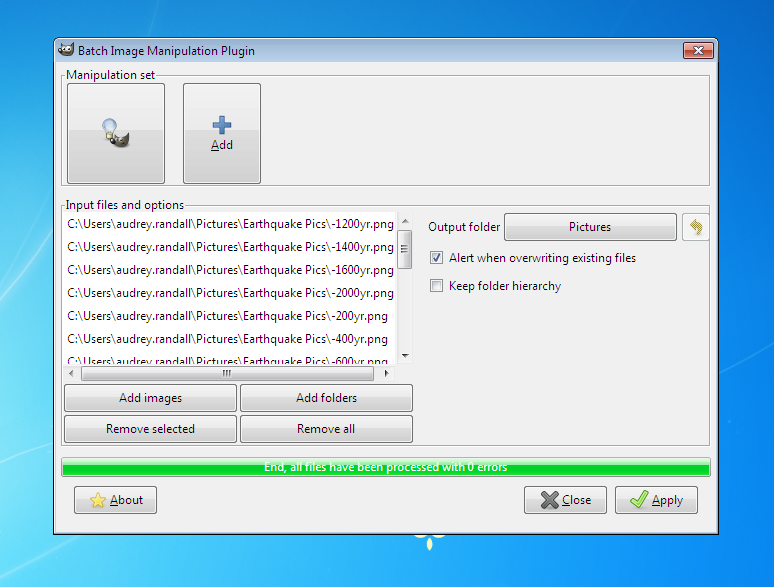
Click Apply. For some reason, I had to click Apply three times before my images actually became transparent, and they only did so when saved to a new folder. I’m not sure what was going on there. But that should be good — you now have your layers of earthquake data, in transparent PNG format!

After processing all of your exported map layers, the BIMP window looks something like this