Making a Base Map
Using Vector Data
Permalink to Using Vector DataThe Basic Vector Styling tutorial on QGIS Tutorials walks you through the process of inserting and styling a vector layer in QGIS.
Using an Image
Permalink to Using an ImageLet’s assume you want to use SOS’s “earth vegetation” image as your base map. That image can be accessed from SOS’s FTP server:
- Go to ftp://public.sos.noaa.gov/. Note that this is SOS’s FTP server, where all of their datasets are available for download, not its website. Go directly to that URL
- Click on “land,” then “blue_marble,” then “earth_vegetation,” then click on 2048.jpg
- Right-click and select “Save image as.” It doesn’t matter where, but make sure you save it as a .tif image — we’ll need it in that format. Save the image in a folder you can find again. When the dialogue box appears to save your image in Windows, there will be a field labeled “Save as type.” Click on “All file formats.” Next, add the extension “.tif” to the name of your image. On a Linux machine, you’ll have to delete the original file extension first: for example, replace .jpg with .tif
Creating a World File
Permalink to Creating a World FileNext, we need to create a way for QGIS to interpret this image; the software can’t tell that it’s actually a map until we create something called a “world file.” A world file is an extra file that QGIS knows to associate with an image file, which gives QGIS a set of “coordinates” to put the image at. It tells QGIS how big the image is supposed to be, how to rotate it if at all, and where to place the corners. A world file must have the same name as the .tif image, but its extension is .tfw, for Tiff World File. This is so that QGIS knows which image to associate with which world file.
Open up a text editor (such as Notepad for Windows or Text Editor for Linux machines) and create a blank file. Its name must be the same as your image; only the file extension should be different. For example, if you have an image named 2048.tif, its world file should be called 2048.tfw. Also, please note that even though the file extension is supposed to stand for “TIFF World File”, it’s “.tfw,” not “.twf.” Save it using the Save as feature in the same folder as your image. If the world file is not in the same folder as its image, QGIS won’t be able to find it.
Now, to create the world file, you have to type in information in a way the computer expects it to appear. World files have six lines, which each contain one number:
- Pixel size in X direction (aka image width)
- Y-axis rotation
- X-axis rotation
- Negative of the pixel size in Y direction (aka image height, with a negative sign)
- X coordinate of the CENTER of upper-left most pixel
- Y coordinate of the CENTER of upper-left most pixel
To find this information, we have to know something about our map. First, with the projection we’re in (and with most world maps), there are 360 degrees in the X direction (the map spans the circumference of Earth) and 180 degrees in the Y direction (the map only goes from the North to the South Pole, not around the other side). We also know that our image is 2048×1024 pixels. Knowing this, we can use the following equations:
- Pixel size in X direction
- 360 degrees ÷ 2048 pixels = 0.17578125 degrees per pixel
- Y-axis rotation
- 0
- X-axis rotation
- 0
- Negative of the pixel size in Y direction
- 180 degrees ÷ 1024 pixels × -1 = -0.17578125 degrees per pixel
- X-coordinate of center of upper-left pixel
- -180 degrees + (0.17578125 ÷ 2) = -179.9
- Y-coordinate of center of upper-left pixel
- 90 degrees - (0.17578125 ÷ 2) = 89.9
0.17578125
0.0
0.0
-0.17578125
-179.9
89.9
Contents of our finished world file, 2048.tfw
Type these numbers into your world file, or copy and paste, and save the file.
Adding a Raster Layer
Permalink to Adding a Raster LayerNow go back to QGIS and go to LayerAdd Raster Layer.
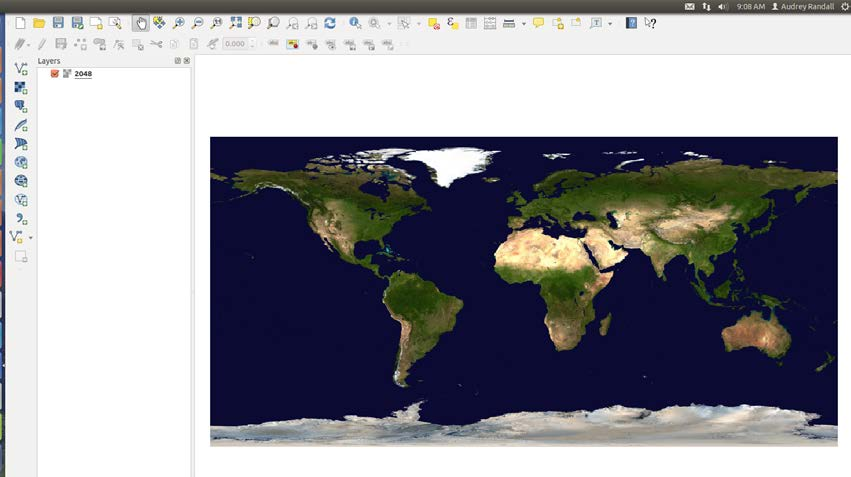
Select your image (2048.tif), not the world file. Click OK. A box will appear asking you which CRS (Coordinate Reference System) the data is in. Select WGS 84 and click OK. Once the image is open, QGIS will know to overlay any other data you might want to insert in the right place on the map.

Your map in QGIS should look like this after loading your image.
Once you have more layers, you can reorder layers by clicking and dragging the layer names in the layer bar to the left of the viewing window, to make one appear on top of or below another.