Exporting Maps as Images
To export a map as an image, you use QGIS’s print composer. This is also where you can add titles, compasses, and scales, but due to the nature of our maps, we usually don’t. It’s pretty obvious which way north is on a globe. SOS recommends that you keep any text that must be stationary on the map, like labels, close to the equator, so that it isn’t warped when the map is transformed onto the sphere. However, the preferred way to put legends, images, and labels onto the sphere is to make a PIP (PIP stands for ‘picture in a picture’). For a detailed description of PIPs, please see SOS’s Datasets Manual. For a description of how to create a PIP, see the Legends, Color Bars, and Scales section of this tutorial.
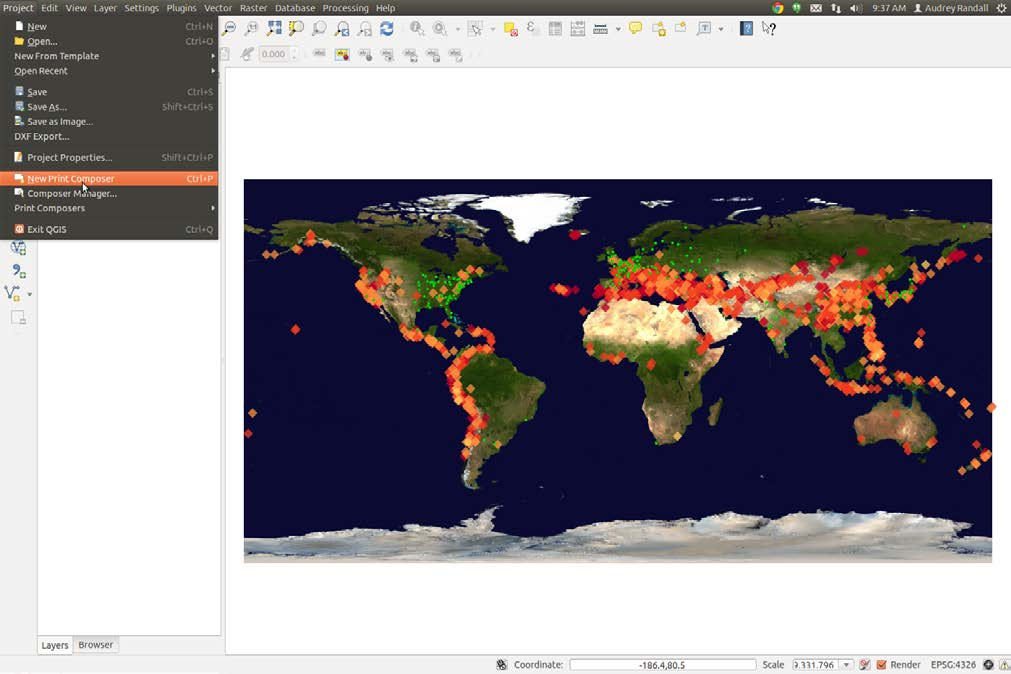
Right-click on your image layer and select Zoom to layer extent. Then go to ProjectNew Print Composer. Name it anything you like.

Open the print composer from QGIS’s Project menu
Click on the Add Map button and draw a rectangle that fills the whole white workspace by dragging your mouse across the workspace. Try to make this as exact as you can. Whatever is on QGIS’s main screen will appear in the box.
If you want to change what’s appearing in your map box, you can change it in the main QGIS window, and then click the Update button under Item Properties. Whatever you most recently clicked on in the composer will get updated. For example, if you have a legend and a map arranged in the composer, only the one that you last clicked on will get updated.
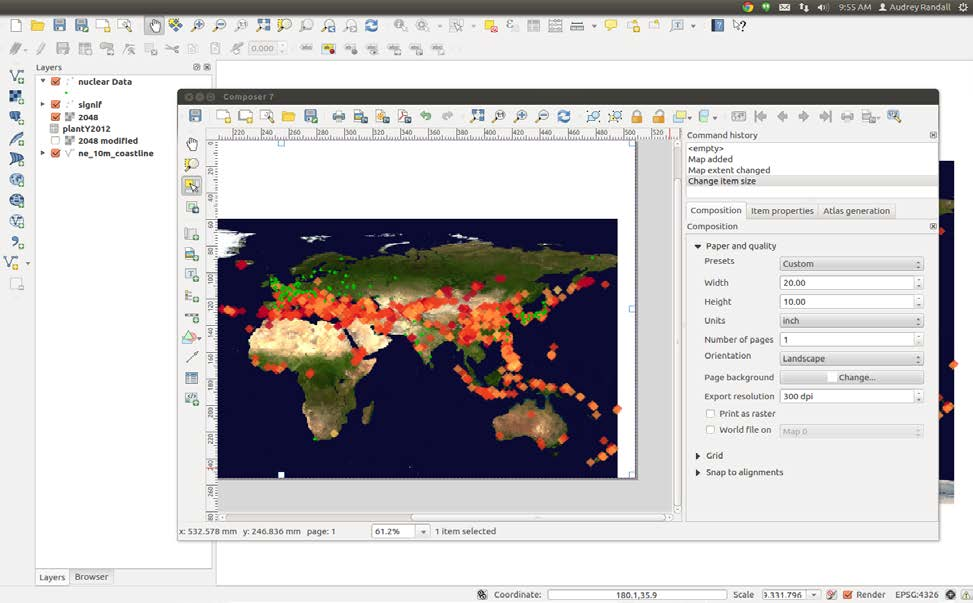
Now look at the menus on the right. First, next to Presets under the Composition tab will be a box with a preset paper size in it. Click on it and select Custom. Then change the width and height to 6.84 inches and 3.41 inches, respectively. This is because we want our export resolution to be 300 dpi (dots per inch, or pixels per inch) and we want the final resolution of our map to be 2048x1024. 2048 divided by 300 is approximately 6.84, and 1024 divided by 300 is 3.41. You’ll probably have to change the units to inches instead of mm. Make sure your export resolution really is at 300 dpi.

Use the Composition in the print composer to define the size of the image you export.
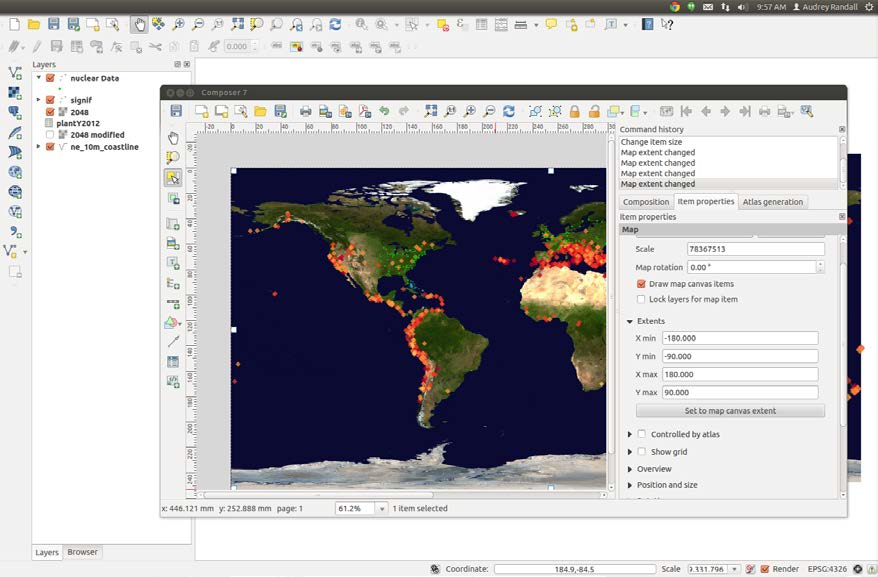
Click the Item properties tab, then scroll down to Extents. To make your map fill the screen as much as possible, change the X values to -180 and 180, and the Y values to -90 and 90. You should see the map fill the entire white space. Check the Scale value under Item Properties. For a map sized 6.84 by 3.41 inches, resolution 300 dpi, the scale should be 114891360. If this is incorrect, it causes problems with the export. Then click the Export as Image button. SOS prefers JPEG or PNG, but can accept most common image formats. Congratulations, you have an SOS-ready map!

Set the Extents for your map to ensure it fills the entire image.