Visual Playlist Editor Translations
The Visual Playlist Editor (VPLE) was released with full functionality beginning in SOS 5.1, replacing the previous playlist editor. The VPLE visually lays out, modifies, and previews SOS playlist content in a flat map display.
The VPLE UI uses a third-party application called Qt Linguist to
assist you in translating from English other languages. You can use Linguist for
new translations or to edit any existing translations. There are two translation
files for each locale under the linked directory
/shared/sos/locale/playlist_editor: xx_YY.ts and xx_YY.qm,
where xx = language (the ISO 639 language code), YY = country or
region (the ISO 3166 country code), .ts = raw (ASCII)
translation format, and .qm = compiled (binary) translation format.
You do not need to know details about these formats to perform your
translations.
The basic workflow to follow when translating the VPLE UI to a new language begins by performing a bulk translation of the text using automated translation software such as Google Translate. This activity consists of a number of steps to prepare the text for loading into a spreadsheet, creating the translations, and converting back to a raw translations file. You can then use Linguist to fix errors and bad translations that were automatically generated.
Here are the steps to create translations of VPLE UI text to a new language. If you are editing an existing translation, just skip to step 6. We will use French as an example.
-
Open a command shell and type the following commands (without the $ and substituting the locale you will be using, i.e., fr_FR.ts for French - fr in France - FR):
$ cd /shared/sos/locale/playlist_editor
$ cp en_US.ts fr_FR.ts
$ translations2db --vple_ts_to_tsv
A set of tab separated value (tsv) files in the form
xx_YY.tsvwill be created, one for each ts file. In the tsv files, VPLE user interface text strings are specified by three columns separated by tabs: Column A is the Context name (internal to the VPLE), B is text in English, and C is (currently) the same text as in column B, which we will be replacing with our translations - If you have a Google Drive account, you can use Google Translate in a web browser to bulk translate the text in your tsv file to many different languages. After logging in to your Google Account, upload the dataset tsv file you want to translate into a Google Sheet. If you don’t wish to do a bulk translation, you can skip ahead to Step 6, using the Linguist application
-
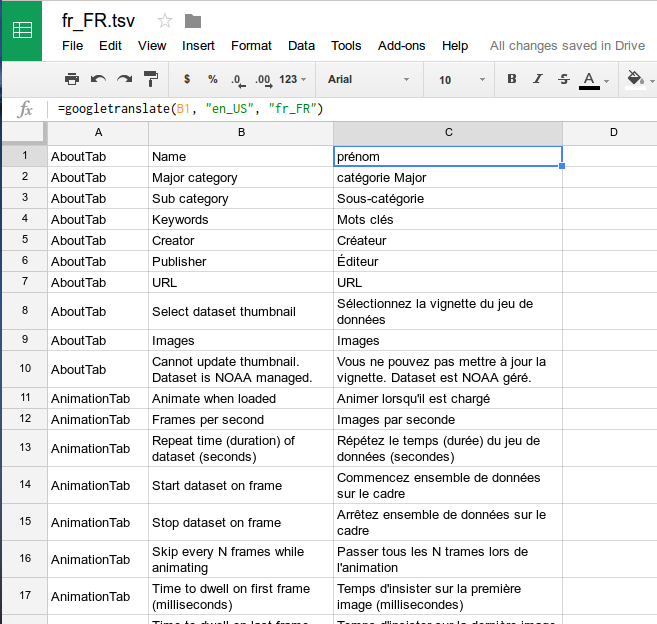
Use Google Translate cell formulas to automatically translate all the text in one column to a new column. Below is an example of part of a fr_FR.tsv file imported to a Google Sheet, with translations of English text in column B to French in column C. The formula entered for the highlighted cell (C1) is shown in the function (fx) field. This formula should be copied to all the cells in column C to perform the full set of translations
-
With the Google Translation done, download the sheet as a tsv file and copy it
into
/shared/sos/locale/playlist_editor/fr_FR.tsv(replacing the original file there) -
In a command shell, type the following command:
translations2db
--tsv_to_vple_ts
. This writes the translations from Google Translate back into the ts translation format. A set of files in the formxx_YY.tsvwill be created, including thefr_FR.tsexample here -
In a command shell, type the following commands:
$ cd /shared/sos/locale/playlist_editor
$ /shared/sos/visual_playlist_editor/default/launch_linguist
The Qt Linguist main window opens up
-
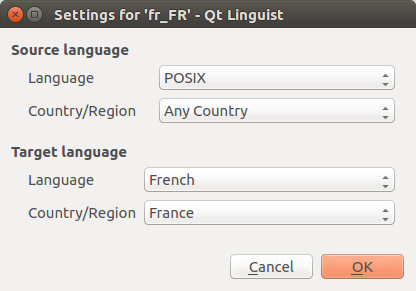
From the menu bar, select FileOpen and select fr_FR.ts to edit your French translations. A Settings dialog box may pop up automatically, but if it doesn’t, from the menu bar, select EditTranslation File Settings…. In the “Settings” dialog box, fill in the “Target language” information for your new locale and press OK
-
Using the Linguist controls, go through each English text element by selecting first the Context item and then the first Source text item. If you wish to make a change, replace the English text in the French translation box with your revised translation. Then click the green Checkmark icon next to the item or in the toolbar to accept the translation edit. Do not type anything in the French translator comments box. The example below shows the translation for Name in the AboutTab Context.
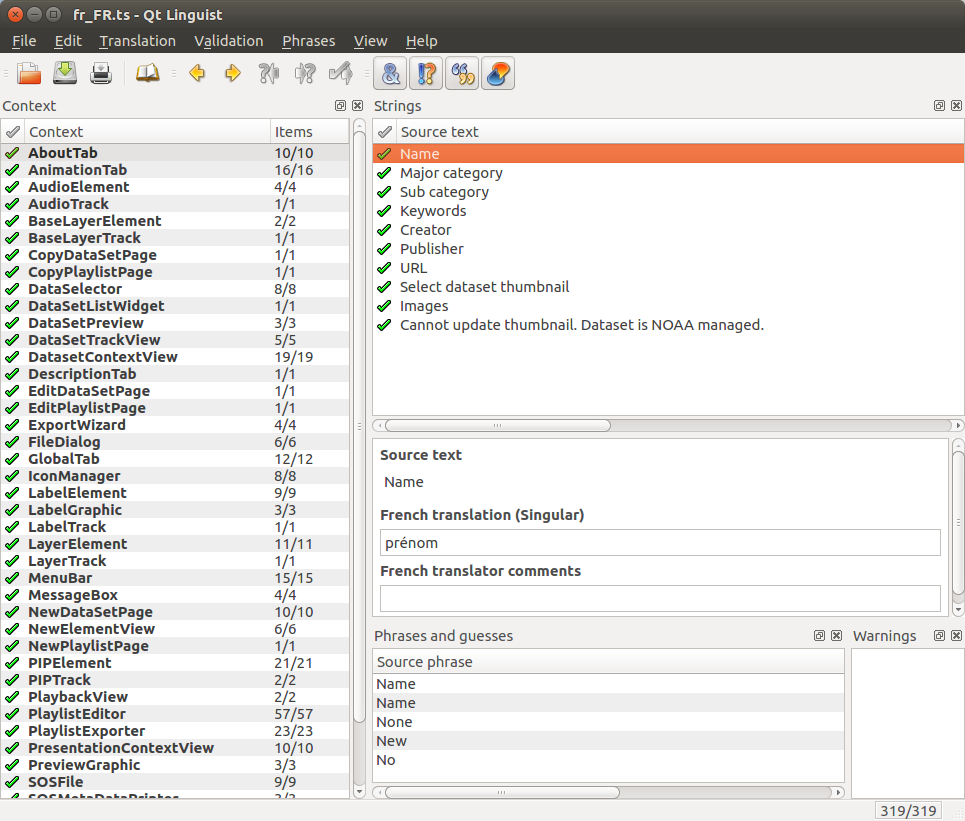
After examining and making selected changes to all the “Source text” elements for the first “Context” item, select the next “Context” item and go through all its “Source text” elements. Continue in this fashion until reaching the end of the last “Context” item
-
You may see that some of the check marks are yellow. This happens when the formatting of the translated text is incorrect. You must fix all of these before your translations are complete! There are two common types of formatting issues to correct:
- accelerators are “&” symbols
- place markers are in the form “%n” with n either 0 or 1 (this is where text determined while the VPLE is running, like a file name, is inserted into the translated text)
To fix these issues, edit the translation so the “&”, “%0”, and “%1” look the same in the translated language as with English (with no extra spaces and in the correct order). Linguist will indicate whether there is still or problem or not. Click the green check mark after each formatting error is fixed
- From the menu bar, select FileSave to save your translations to the raw translations ts file (fr_FR.ts in this example)
- From the menu bar, select FileRelease to write your translations to the compiled (binary) translations file. In this example, the file will be named fr_FR.qm
- You are now ready to test your translations. When you run the VPLE, from the menu bar, select the Languagefrançais and the user interface text should switch to French. If you find any missing or incorrect translations, return to Linguist to examine and edit the French text, making sure to “Save“ and “Release” to prepare your changes for the VPLE
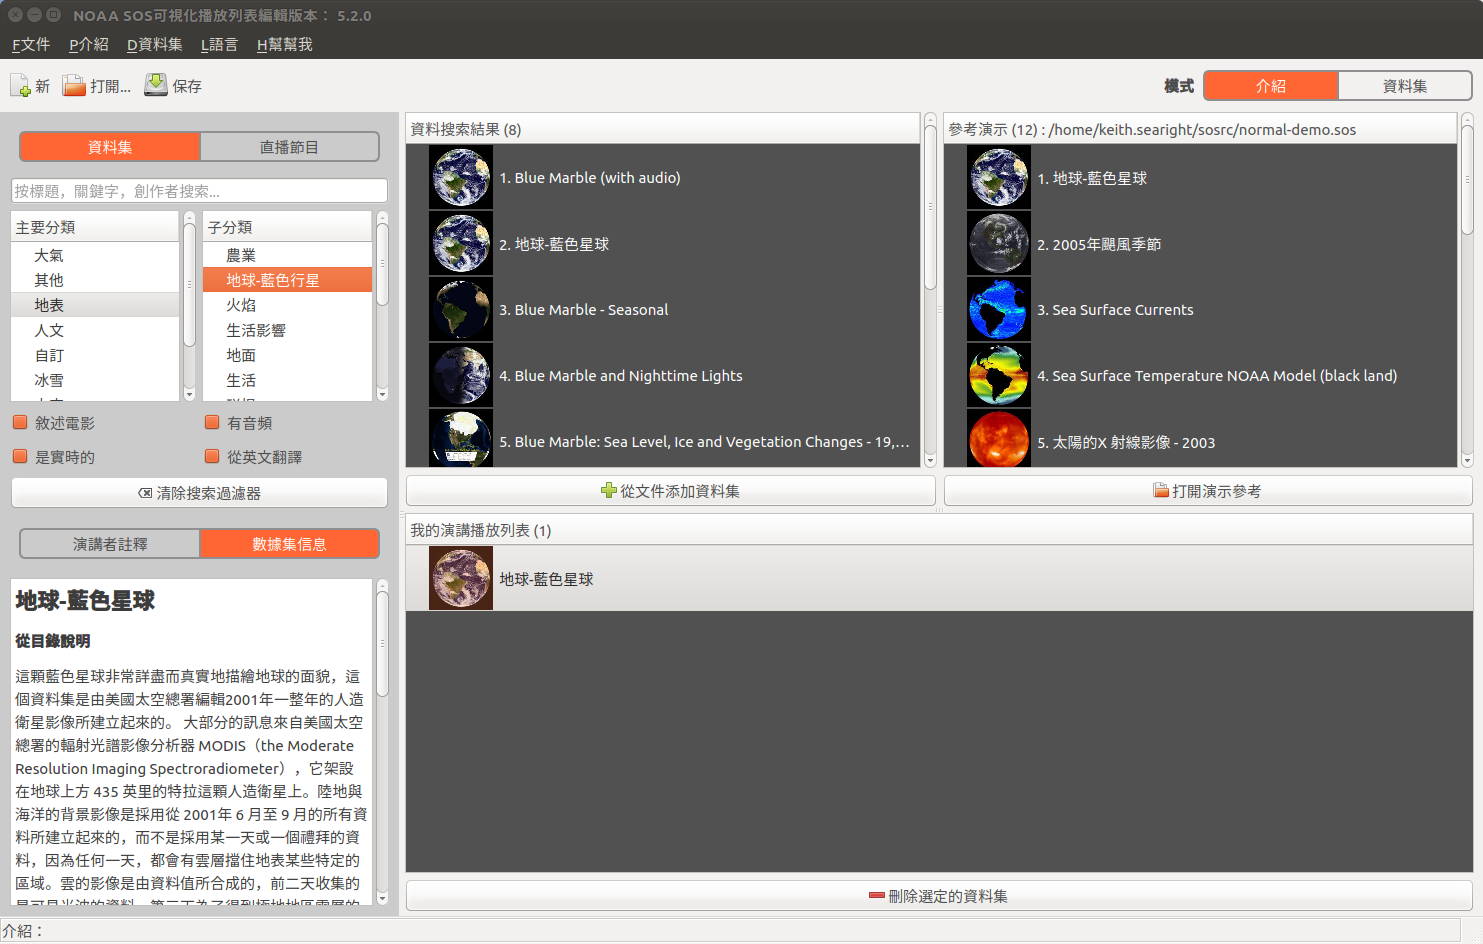
An example with the VPLE UI in Presentation mode translated to Traditional Chinese, along with the SOS Data Catalog.
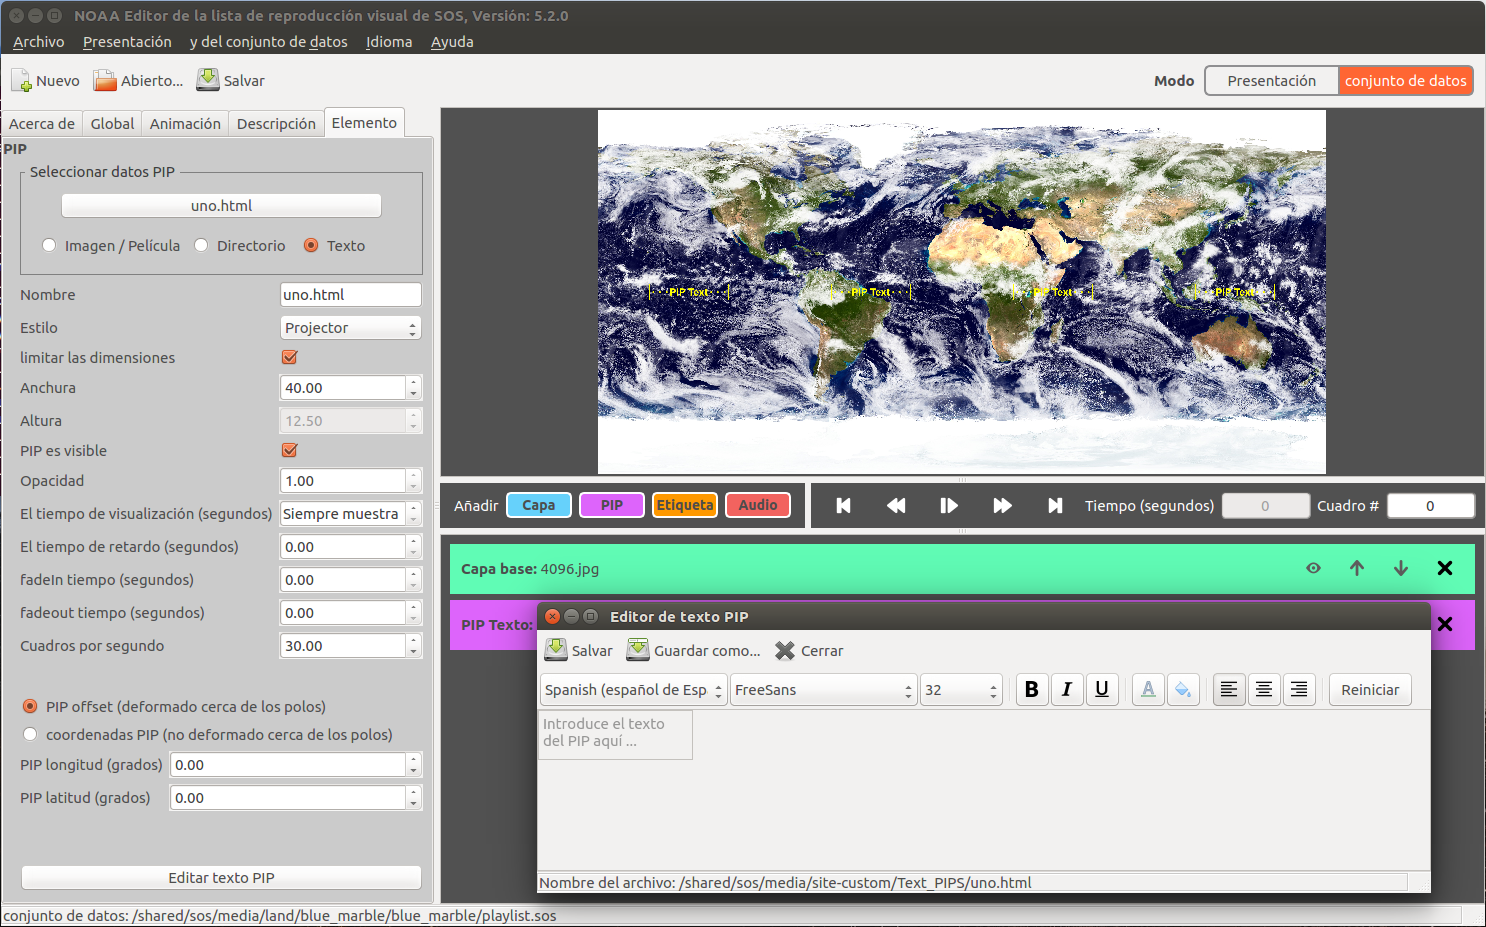
An example with the VPLE UI in Dataset mode with the Text PIP editor translated to Spanish (generated using Google Translate).