Operations and Systems Administration
This manual is intended for Systems Administrators and others that have responsibility for maintaining the hardware and software components of the Science On a Sphere® system (SOS).
For information on aligning your SOS, please consult the SOS Alignment Manual.
System Configuration
Permalink to System ConfigurationBasic Setup
Permalink to Basic SetupSOS is a collection of hardware that integrates computers and video projectors to display animated images onto the surface of a large sphere. Taken in pieces, the system consists of a sphere situated in a room, surrounded by four video projectors, numbered one to four starting with number one closest to the computer and then going counterclockwise.
The video projectors are connected and driven by the primary computer. Each projector is responsible for its own quadrant of the sphere. The computer has one six output graphics card to support the four projectors and a second graphics card to run the user interface. The computer pulls in content, usually some type of planetary imagery, renders it to an Earth projection, subsets it, and upon command displays it onto the sphere. The computer is responsible for many things, namely among them: running the main user interface to the system, real time data collection, and providing the interface to the automation control protocol. All of the computers use the Linux operating system Ubuntu (currently version 16.04). Most sites buy a “hot” spare that is identical to the primary computer in terms of hardware, as a backup system. All of the software that drives and controls the SOS system is written and maintained by NOAA.
System Specifications
Permalink to System SpecificationsThe computer in the SOS system is a standard computer system with mid- to high-end graphics cards.The system is generally specified so that both the primary and spare computers are identical from a hardware perspective to allow easy swapping of components (in case of system failures).
Projectors are usually specified so that they work well in high duty hour environments. Mostly, projectors classified as “board room” projectors meet this requirement. These projectors typically have multiple fans to provide adequate cooling during the day. The projectors are also specified so that they produce a high light output (lumens), mostly in the range of 3500 to 5000 lumens. The supported resolution for the projectors should be at least 1024x768, though higher resolutions are recommended.
An audio system is part of a standard SOS exhibit. A typical setup includes a mixer, microphones, and four speakers. Some of the content that comes with Science On a Sphere® includes a narration track with background music, requiring the use of the audio system. Also, presenters often use the microphones, if available, during large presentations. Each site is responsible for designing their audio system to meet their needs.
Site Configuration
Permalink to Site ConfigurationEach site is configured differently in regards to projector height, distance and resolution. All of this information is stored in /home/sos/sos_stream_control.config if you’re using a SOS version 5.4 and below, or held in /shared/sos/site-config/local_sos_config.json if you’re on version 5.5 or above. The parameters in this file are set during installation and normally should only be changed if the exhibit is reconfigured. Details on what is in this file and a few options you can modify are discussed in Appendix A: SOS Stream Control Configuration File.
Every site also has individual alignment files that are stored in /shared/sos/site-config. In this directory you will find the alignment files. All of these files are included in those that are backed up and synced daily.
SOS Crontab
Permalink to SOS CrontabCron is a time-based job scheduler that is used to automate processes on the computer. The crontab is the file that contains all the information about the jobs that are scheduled. The SOS computers come with a default crontab that can be edited by each site. Included in the default crontab are hourly real-time data downloads, daily data syncs and backups, and weekly downloads of new datasets. The crontab can also be configured to include the automatic power up and down of the projectors if desired. In a terminal, entering crontab –l will display everything that is included in the cron. For more information about the cron, watch the “How to Edit the Crontab” video tutorials in our tutorials.
Network
Permalink to NetworkThe computers are connected via a gigabit network to enable high speed communication and data transport.The primary and spare computers reside in a private, non-routable network space (usually in the 10.x.x.x network range). The primary computer, however, also usually sits on the border between the private SOS network and the sites local Intranet. The primary computer sits at the border of the network to enable outside access for remote systems administration, software updates,and download of real time data from the NOAA servers. While the local, private SOS network is gigabit, the external connection can be whatever the local site supports in their network infrastructure. If supported by the projector infrastructure, the projectors can also be connected to the private network to allow for remote power on/off.
In many cases a Wi-Fi network is also set up to allow use of the iPad SOS Remote App. An existing Wi-Fi infrastructure can be used, or a dedicated Wi-Fi network can be set up for use with SOS. A dedicated Wi-Fi network provides the most responsive control of your SOS system by the app. Doing this in a secure way requires some network expertise. You may need to select a Wi-Fi channel that doesn’t conflict with other Wi-Fi networks, for example. Using the minimum transmitter power that you need is always a good idea. And WPA2 encryption is probably the minimum level of encryption you will want to use. You might want to turn off the beacon identifier for your Wi-Fi router to make it less obvious to casual visitors at your site. You might also consider limiting access to the specific MAC addresses of your portable devices. SOS personnel work with the site staff to determine the best options for each individual site.
User Accounts
Permalink to User AccountsAdministrators of Linux sometimes need access to the super user account
(similar to the Windows “administrator” privileges). The super user account in
Linux is called “root”. The password is set at machine installation and can be
changed locally at the site. It is generally considered safer, or at least a
better practice, to not use root directly, but rather use the sudo command that
temporarily raises a normal users privilege to root for the duration of a
single command. Only the sos user has sudo privileges.
- sos is an administrative account that has the ability to download new data, run the alignment software, install updates and manage the real-time data downloads
- sosdemo is used for day-to-day system operation and running the SOS software. The user sosdemo does not have permission to delete data, edit the software or run alignment. This user is intended to serve as a “safe” mode, where the computer operator will be able to do very little damage to the software or the data
Every process that runs under Linux must have a user id. The SOS system uses two user ids: sos and sosdemo.
Backups
Permalink to BackupsThe computers are set to run backup scripts early every morning to push data from the primary computer to the spare computer. In general, all of the data that comes with the system can be retrieved from NOAA, however, there are some data files that are customized to be site specific. Examples of site specific data include the custom playlist data in the SOS home directory, the alignment configuration files that are in the home directory, and any custom or local site content that was developed and installed on the system.
All of the media files and playlist files are synced from the primary to the spare computer so that there is a backup copy on the spare computer. Backup copies of the playlist and alignment files are stored on the spare computer in /shared/sos/site-backup.hostname. In case of failure, the spare computer has a duplicate copy of everything needed, though the alignment files will have to be moved from the backup folder to /shared/sos/site-config. Sites are still encouraged to backup data on a separate system as well. Generally, the playlist and alignment data are just a few megabytes (usually much less). In terms of content, only the content developed by the site needs to be backed up on a separate system. All of the content that comes preloaded on the system is always available from NOAA. The custom content can sometimes be many gigabytes, but is definitely worth backing up.
In addition to syncing the computers, backups are also stored on the local computer in /shared/sos/site-backup.hostname. In this directory, you will find dated files for every day that contain all of the same files that are synced to the other computer (excluding the media tree), including configuration files and playlists. In addition, backups of the playlist files are tarred and stored every time the playlist editor is opened. Those files are in the home folder for each users in a directory called sosrc-backups: /home/sos/sosrc-backups and /home/sosdemo/sosrc-backups.
Software Security
Permalink to Software SecurityWe have increased our software security measures starting in SOS version 5.3. SOS now requires a new licensed Wibu CodeMeter security USB dongle before you can do the software upgrade. You can request one using an online SOS Version 5.3.0 Upgrade Request form. Once SOS Support has received your request, a dongle will be mailed to your site. If you run into any problems using the request form you can e-mail sos.support@noaa.gov. We will provide instructions on how to upgrade your system to 5.3 once we have mailed out your new CodeMeter device.
Note that unlike the previous Bluetooth USB devices used in earlier versions of SOS, you will have only one CodeMeter dongle that will be required to be plugged into the computer that is running SOS. This means if you switch to using your backup system, you will also need to physically move the CodeMeter dongle to that machine before you can run SOS. Also, if your site is using Bluetooth to connect your iPad to SOS, you will still need to keep the current dongle keys in place as the Bluetooth software depends on them.
System Maintenance
Permalink to System MaintenanceAlignment
Permalink to AlignmentFor system maintenance, the main priority is keeping the projectors aligned. The rest of the components in SOS tend to be rather maintenance-free. Projector alignment should be checked frequently (once a week ideally) to ensure that the system is aligned properly. Usually, the system only gets out of alignment when there has been some disturbance to the projectors. It is recommended to check it weekly just to ensure that the system is displaying data in an optimal manor. If the alignment is really off, it will be visible in the display of datasets. For more details on how to align your SOS system, see the SOS Alignment Manual.
Power Down Schedule
Permalink to Power Down ScheduleGenerally, it is recommended that both of the SOS computers remain powered up all the time in order to receive real time data and for system backups. The projectors only need to be on during operation and should be powered down to save lamp life when not in use. If the projectors have network capability, it’s possible to set the projectors on a timer with schedule power on and power off times. If a complete system power down is required, then it is recommended to close the SOS software before powering down the computers. A single press of the power button starts a clean shutdown.
Projector Filters and Lamps
Permalink to Projector Filters and LampsProjector lamps are the main consumable for SOS. A typical projector lamp lasts anywhere from 1500 to 3000 hours. In darker settings, the economy mode can be used to extend the life of the lamp. As a projector lamps ages, it will start to dim or show discoloration and then in many cases, suddenly go out. Generally, the projector will turn on a lamp warning light indicating a new lamp is needed. It’s a good idea to have a spare lamp on hand in case of a sudden failure. It is suggested to follow the manufacturer’s recommendations on lamp replacement. When lamps are replaced because of age, it is recommended to replace all of them at the same time, since the color and intensity difference between an old lamp and a new lamp will make the sphere visualization look bad.
Projector alignment will need to be adjusted after replacing the lamps. When replacing the lamps, change one lamp and then fix the alignment of that projector before moving on to the next projector. If you replace all the lamps without adjusting the alignment along the way, then you will have to start from scratch on the alignment.
For LCD projectors, projector air filters should be checked monthly to ensure proper airflow. At minimum, check the filters every quarter, though this depends largely on the projectors environment. Dusty areas require more frequent filter cleaning. Dirty filters reduce cooling capacity and shorten projector lamp life. This is probably the most important of the maintenance tasks to perform.
For DLP projectors, the optics are sealed and dust is not as much of a concern. In fact, many DLP projectors do not have air filters. Check your specific model to determine if there is an air filter to clean.
Computer Maintenance
Permalink to Computer MaintenanceThe SOS systems are like any other computer system. In general, they run and run without the need for maintenance. Ubuntu releases operating system patches frequently and patches that affect security should be applied as needed. Notification of patches will appear in the left-hand menu in the Ubuntu Update Manager.If NOAA comes across an operating system patch that adversely affects system operation, sites will be informed through the SOS Google Group.
Periodically, software upgrades from NOAA for the SOS software will be distributed. The SOS software upgrades will also appear in the Ubuntu Update Manager. It is up to each site to decide if they want to install the upgrade. An announcement with full instructions for the upgrade and a description of the new features in the upgrade will be posted to the SOS Google Group when available.
Should you encounter problems with the SOS software, the log files can be a good place to turn to try to diagnose what is happening. The log files for SOS are stored in the home folder for each user in a directory called soslogs/. The logs vary from crash reports to download progress reports.
General Machine Updates Using A GUI
Permalink to General Machine Updates Using A GUILog in as the sos user, since this user has admin privileges. Use the “Ubuntu Dash Home” to search for the “Ubuntu Software Updater”.
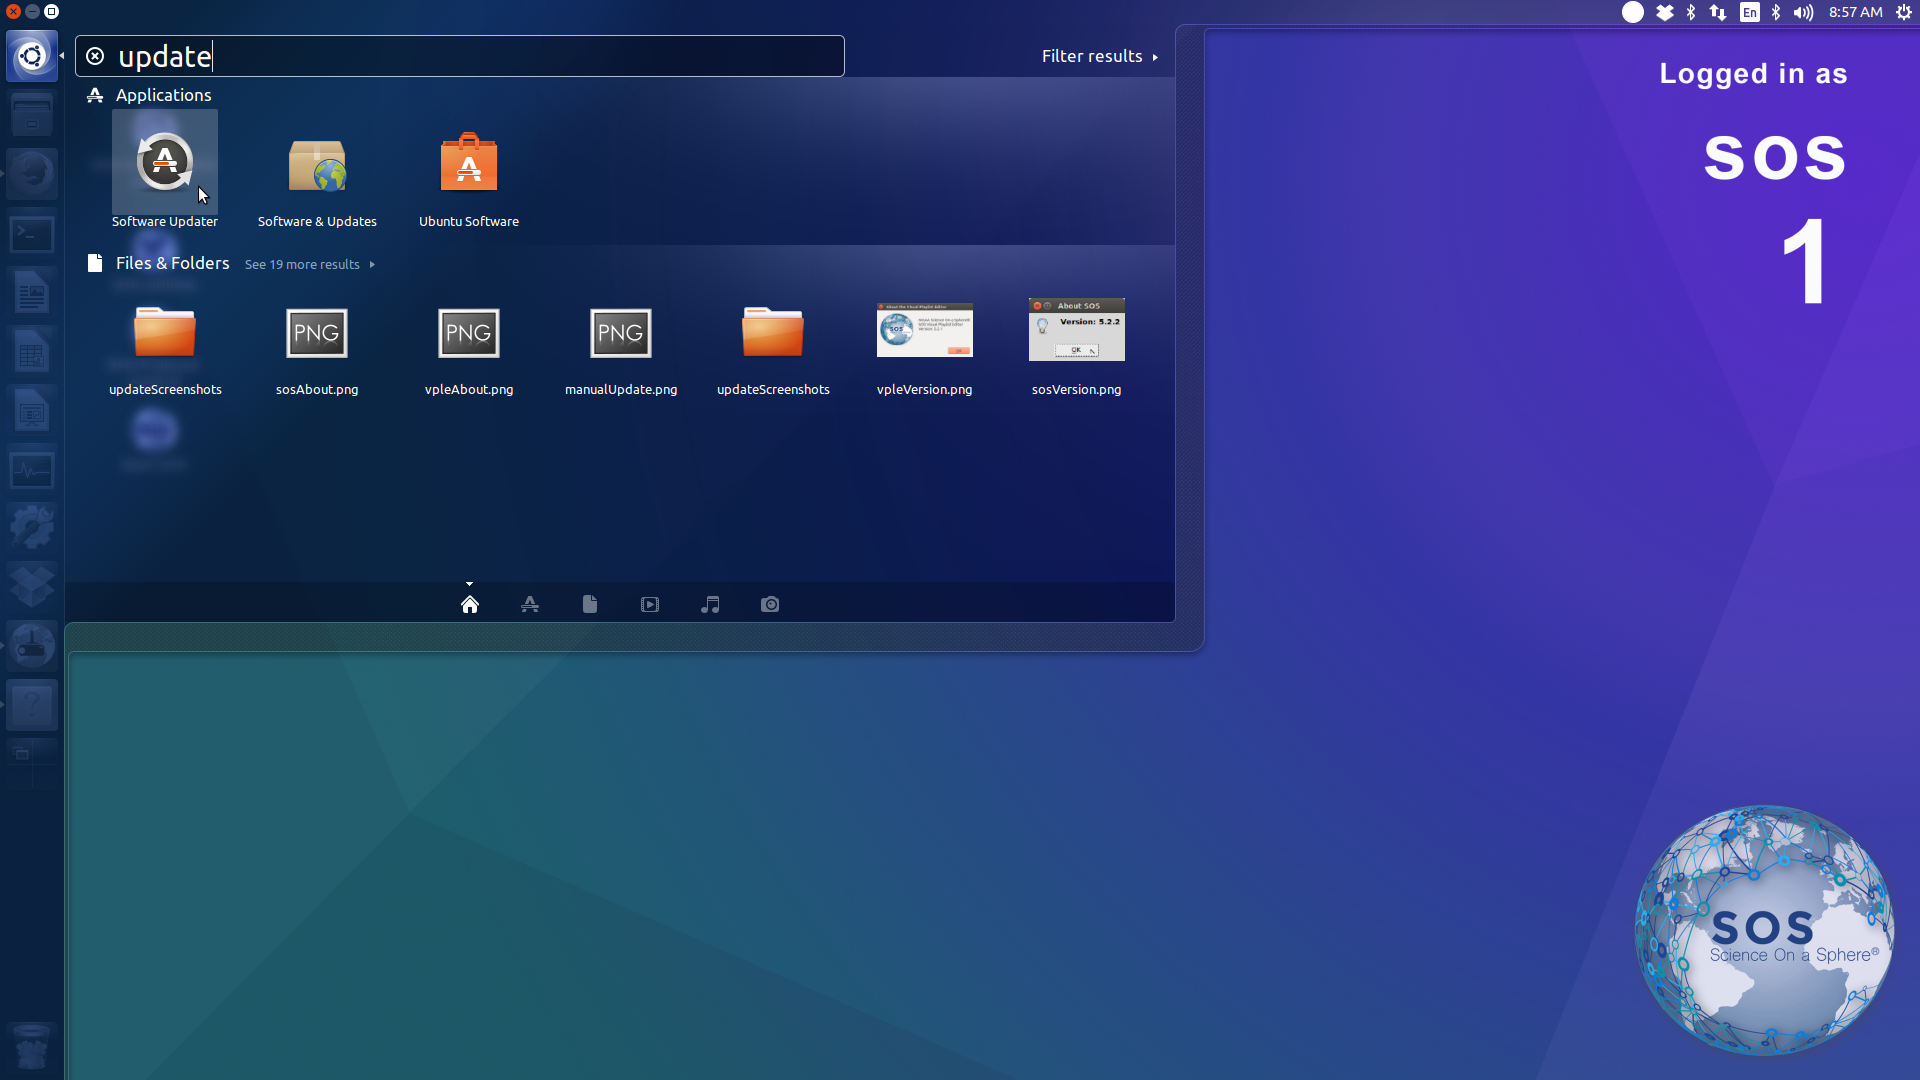
Click the “Software Updater” icon, and Ubuntu will start checking for updates.
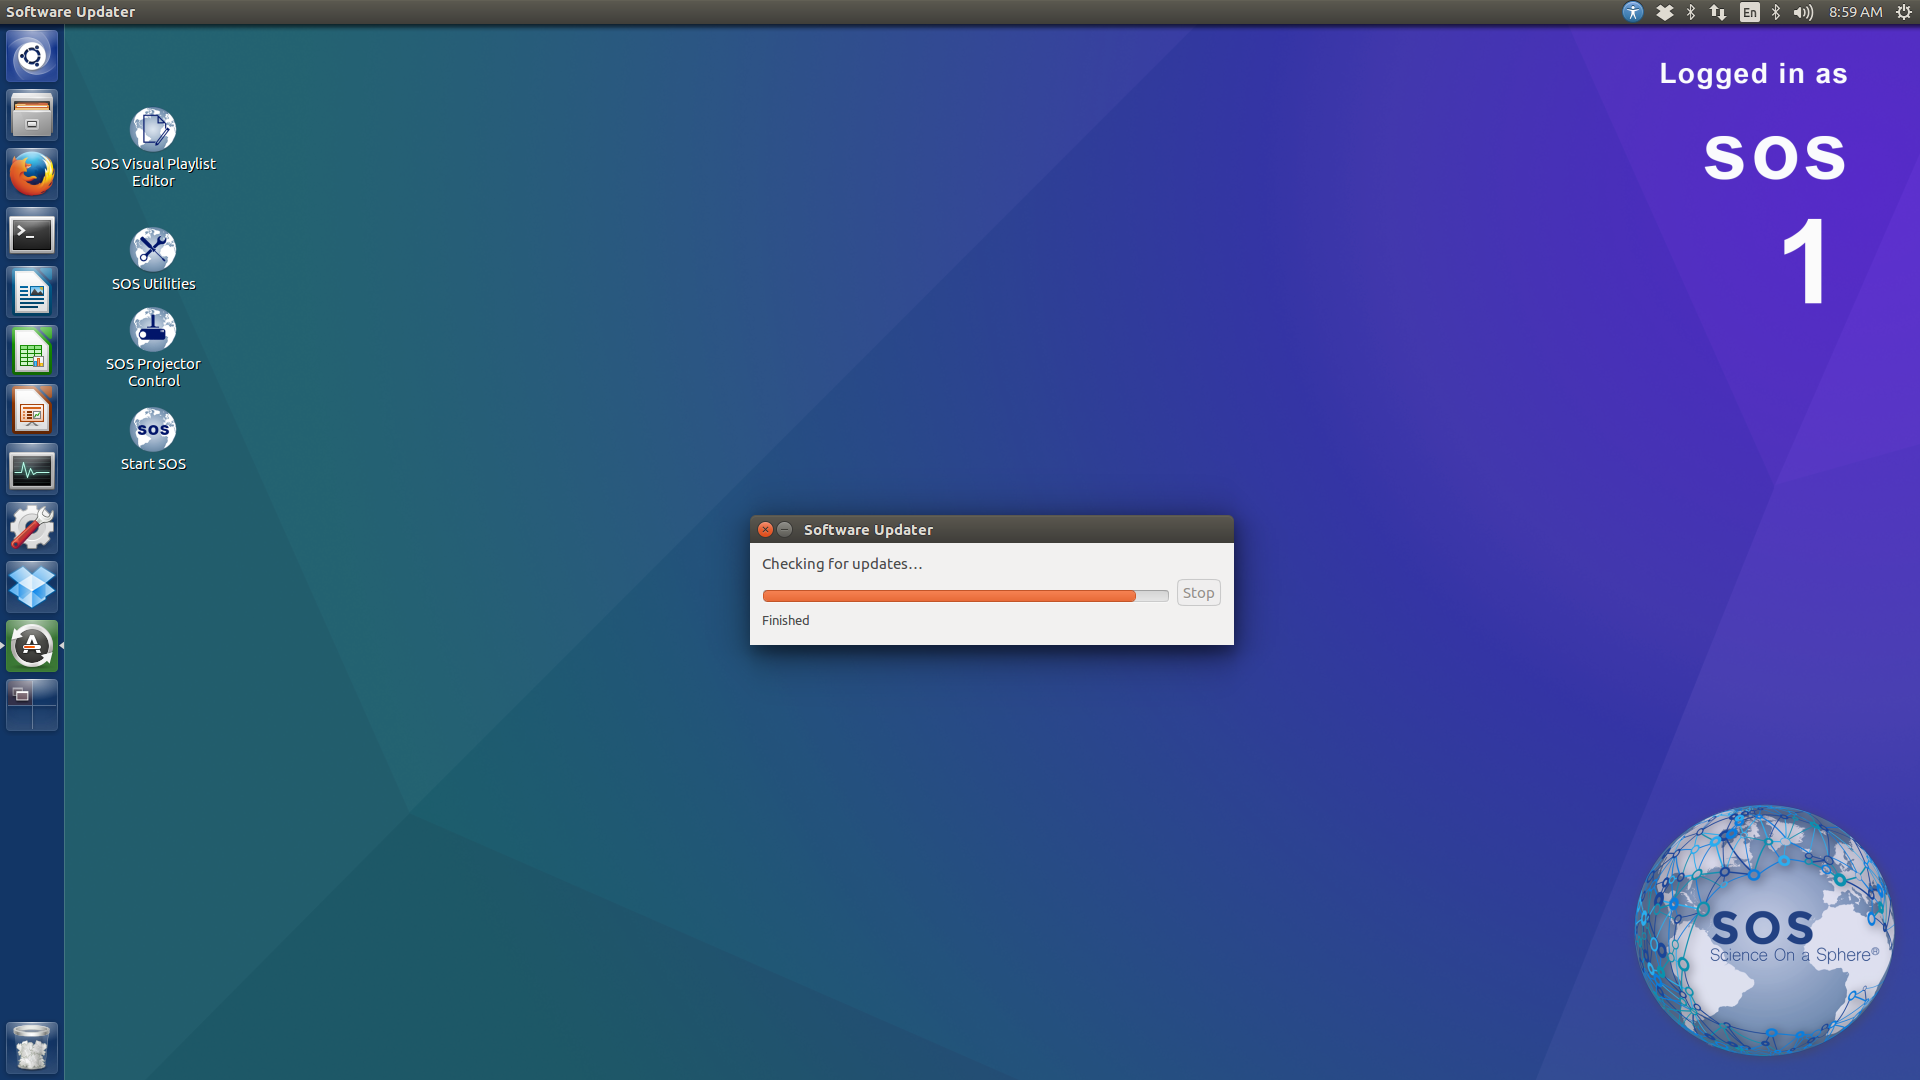
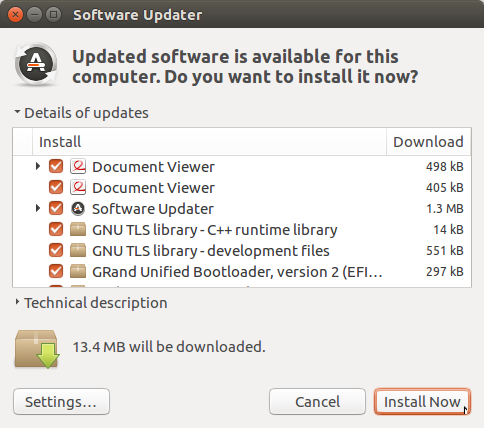
If it finds packages that need to be updated, go ahead and update. The “Software Updater” will update all Ubuntu software, not just SOS software.
If your computer already has all packages updated, the “Software Updater” will notify you.

Updating SOS Using a GUI
Permalink to Updating SOS Using a GUIIf you’d like to update SOS, we provide a custom updater tool within our SOS Utilities application on your Desktop. Please open this menu, and you should see this image below:

Choosing the first option, “Check For SOS Update”, will automatically check and download any SOS updates for the product suite, along with any Ubuntu OS updates. You will need to enter your computer’s sos password in order to have the necessary permissions to update, so please have that available.
Checking SOS Versions
Permalink to Checking SOS VersionsNote that not all components of the SOS software suite will have the same version. Each SOS component may be updated individually.
SOS Version
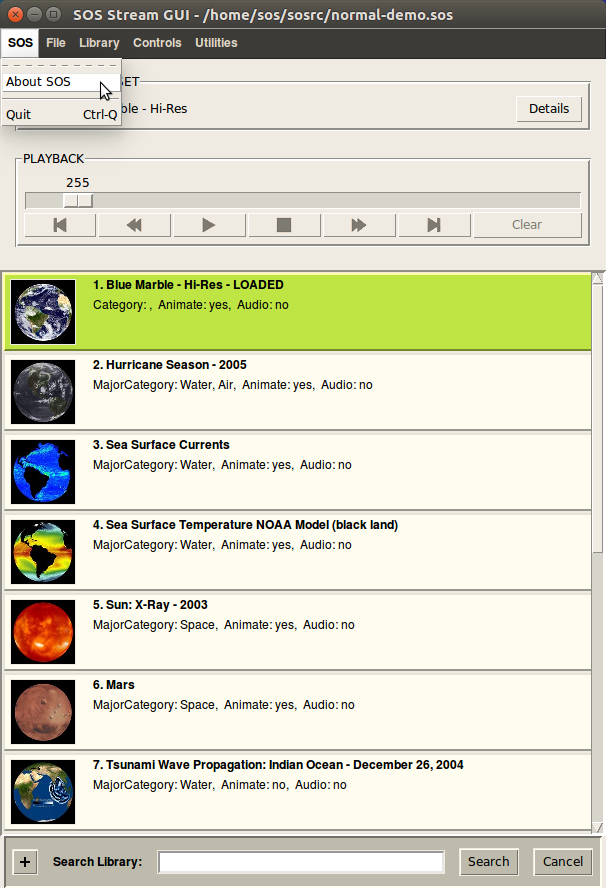
Permalink to SOS VersionTo check which version of SOS is installed, open the SOS software using the desktop launcher or by searching for SOS in the “Ubuntu Dash Home”.
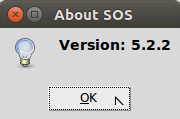
In the “SOS Stream GUI”, click FileAbout SOS to show the SOS software version.
SOS Visual Playlist Editor Version
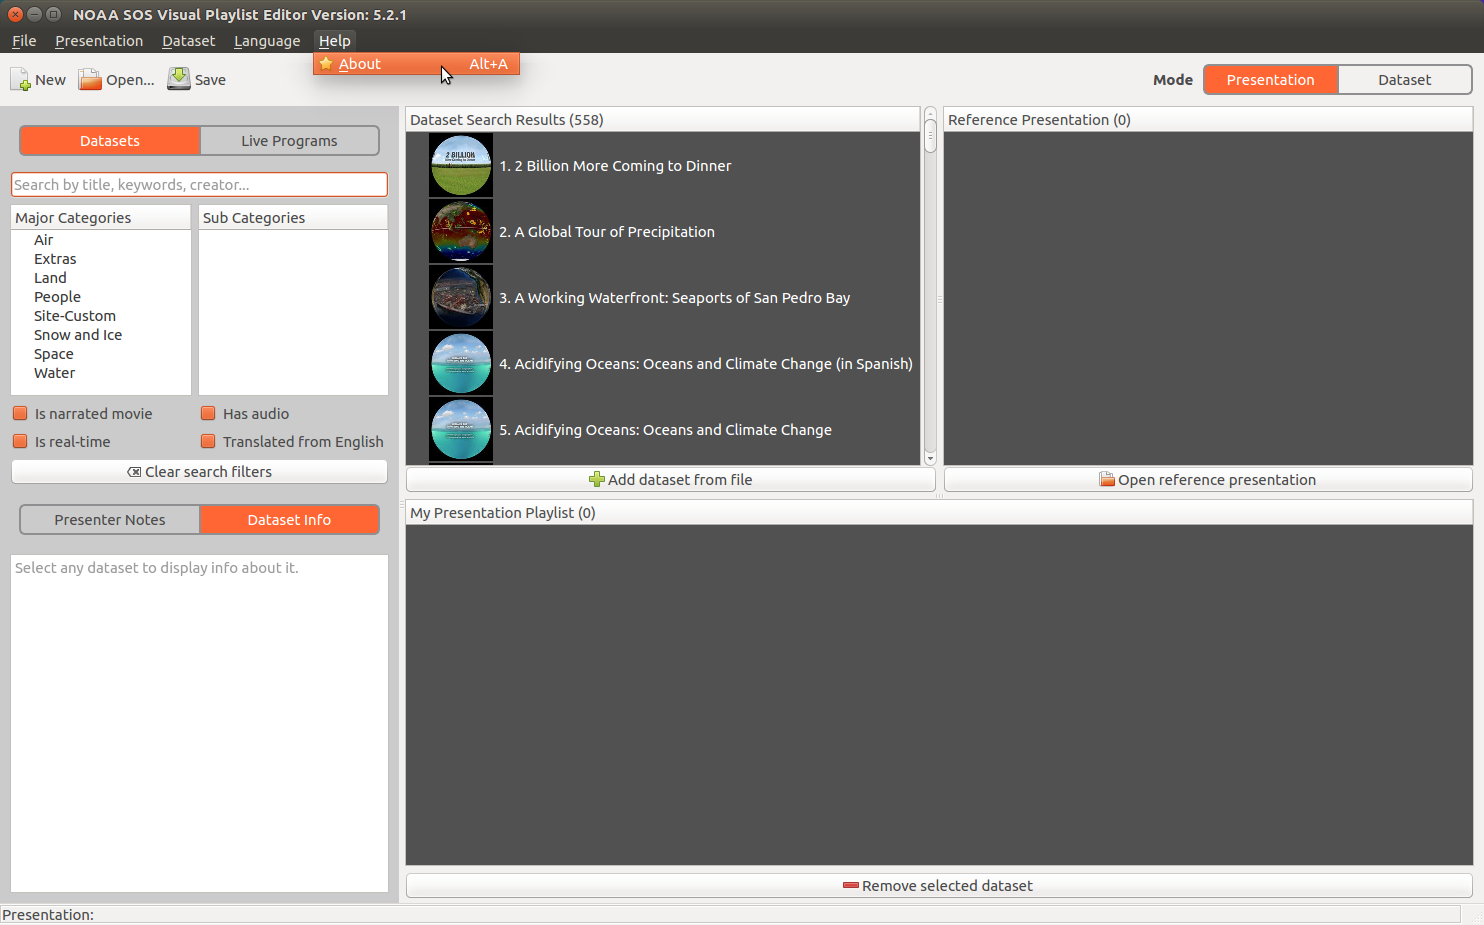
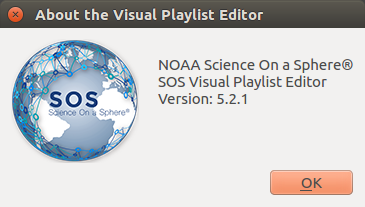
Permalink to SOS Visual Playlist Editor VersionTo check for the SOS Visual Playlist Editor (VPLE) software version, open the VPLE using the desktop launcher or by searching for it with the “Ubuntu Dash Home”. Click “Help → About” to show the VPLE software version.
SOS Projector Control Version
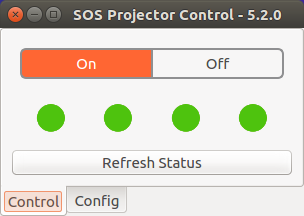
Permalink to SOS Projector Control VersionTo check for the SOS Projector Control software version, open the application with the desktop launcher or by searching for it with the “Ubuntu Dash Home”. The version should be in the title bar of the application window.
SOS Remote App Version
Permalink to SOS Remote App VersionTo check the iPad SOS Remote App software version, open the iPad settings.
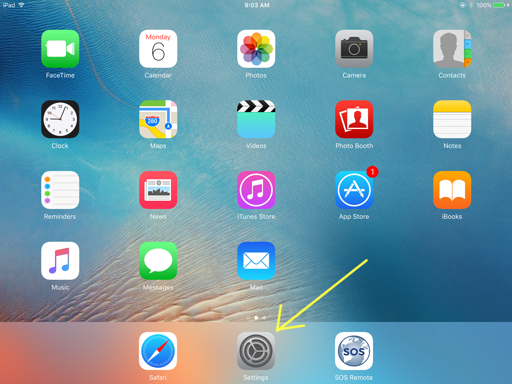
Scroll down to the bottom of the left pane of the settings window to find the “SOS Remote App” and tap on it to show application information.
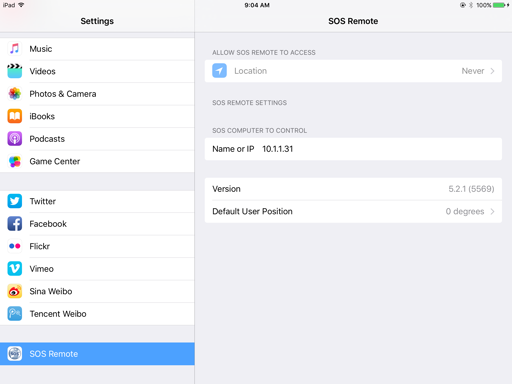
Updating SOS Using the Terminal
Permalink to Updating SOS Using the TerminalLog in as the sos user, since this user has admin privileges. Use the “Ubuntu Dash Home” to search for the Terminal application.
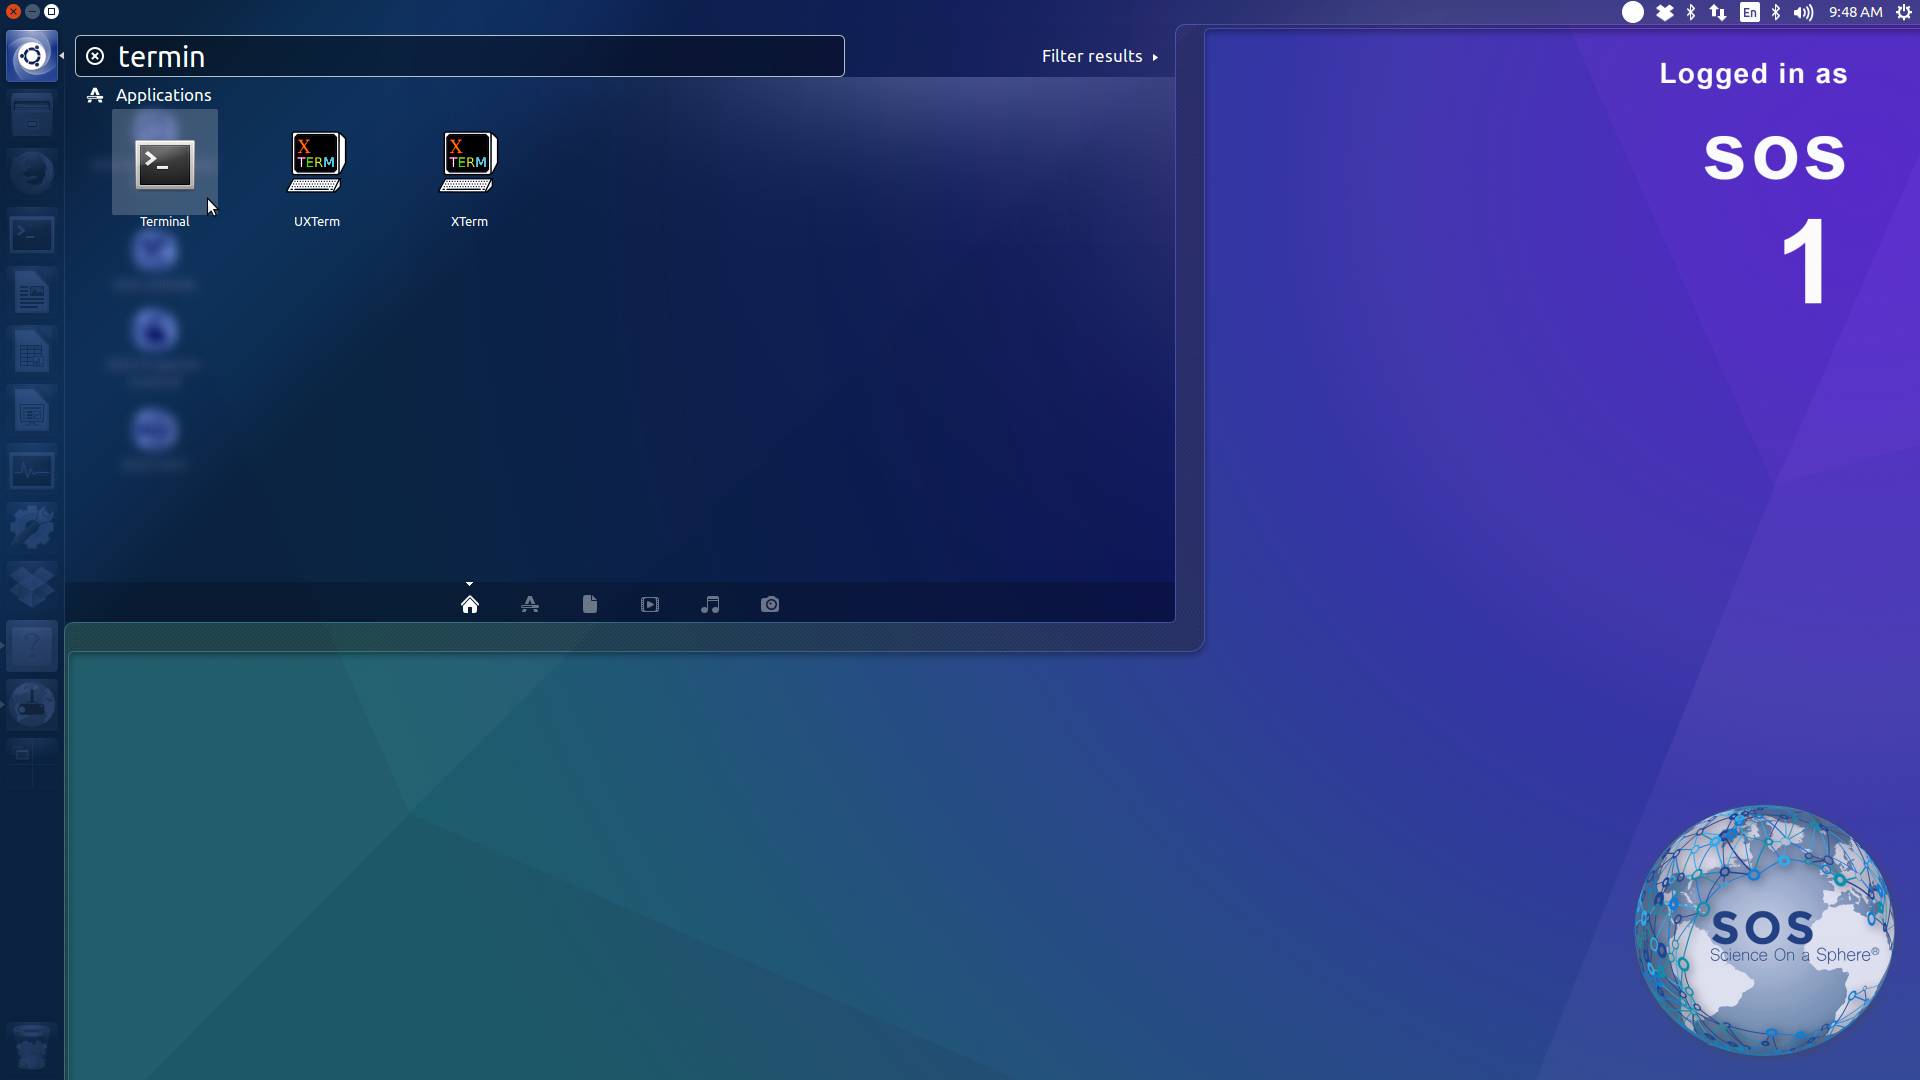
Update the Ubuntu package cache with the command: sudo apt update.
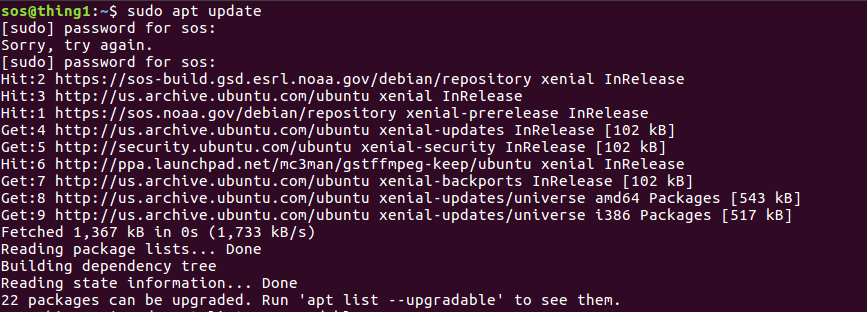
Optionally, request that Ubuntu list the packages that have updates available:
sudo apt list --upgradable.
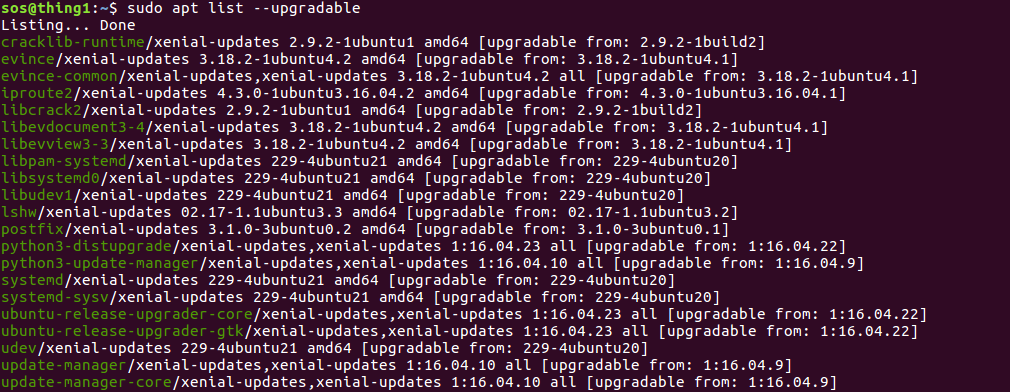
Next, tell Ubuntu to install the packages which have updated versions
available: sudo apt-get dist-upgrade.

Checking SOS Versions Using the Terminal
Permalink to Checking SOS Versions Using the TerminalTo check which version of the SOS software you are running, open the Terminal
application and run the command: dpkg -l | grep sos.
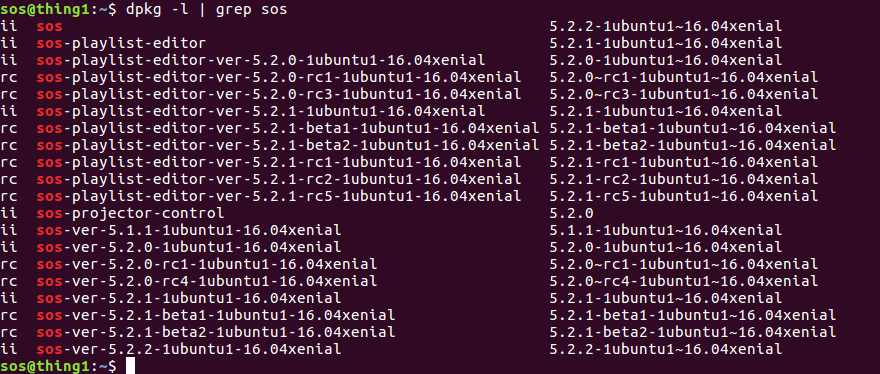
The first column, contains either ii or rc, to indicate the packages
installation state. An installation state of ii means the package is
currently installed. An installation state of rc means that the package is no
longer installed, but there may be configuration files which are still
installed.
Remote Login
Permalink to Remote LoginIn order facilitate support, maintenance, and troubleshooting, the SOS computers come loaded with a program called “TeamViewer”. This is launched from the SOS Utilities application. This program allows the SOS support team to logon remotely to the SOS computers and temporarily take over the desktop. The site must launch the software and provide log in information to the SOS team in order for them to log on. The SOS team will only log in at the request of the site and at a scheduled time when it is convenient for the site.
System Control
Permalink to System ControlTurning the System On and Off
Permalink to Turning the System On and OffWhen you turn on the primary computer, it will automatically log into the user sosdemo. The primary computer should be always on. The spare computer doesn’t have to be on, but it is recommended to leave it on for backup purposes. If you want to change users you will have to log out and then log in using your user name and password. There is an icon that looks like a power button in the top right menu bar for logging in and out.
To shut the system off use the icon that looks like a power button in the top
right menu bar. This lists many options including log out, shut down, and
reboot. Typing shutdown -h now to shut down or sudo reboot to reboot in a
terminal also works. To force a sudden power off hold the power button for 5
seconds. This last option is to be used only as a last resort.
SOS Desktop
Permalink to SOS DesktopWhen first logging in to the SOS machine, you will see the SOS desktop.
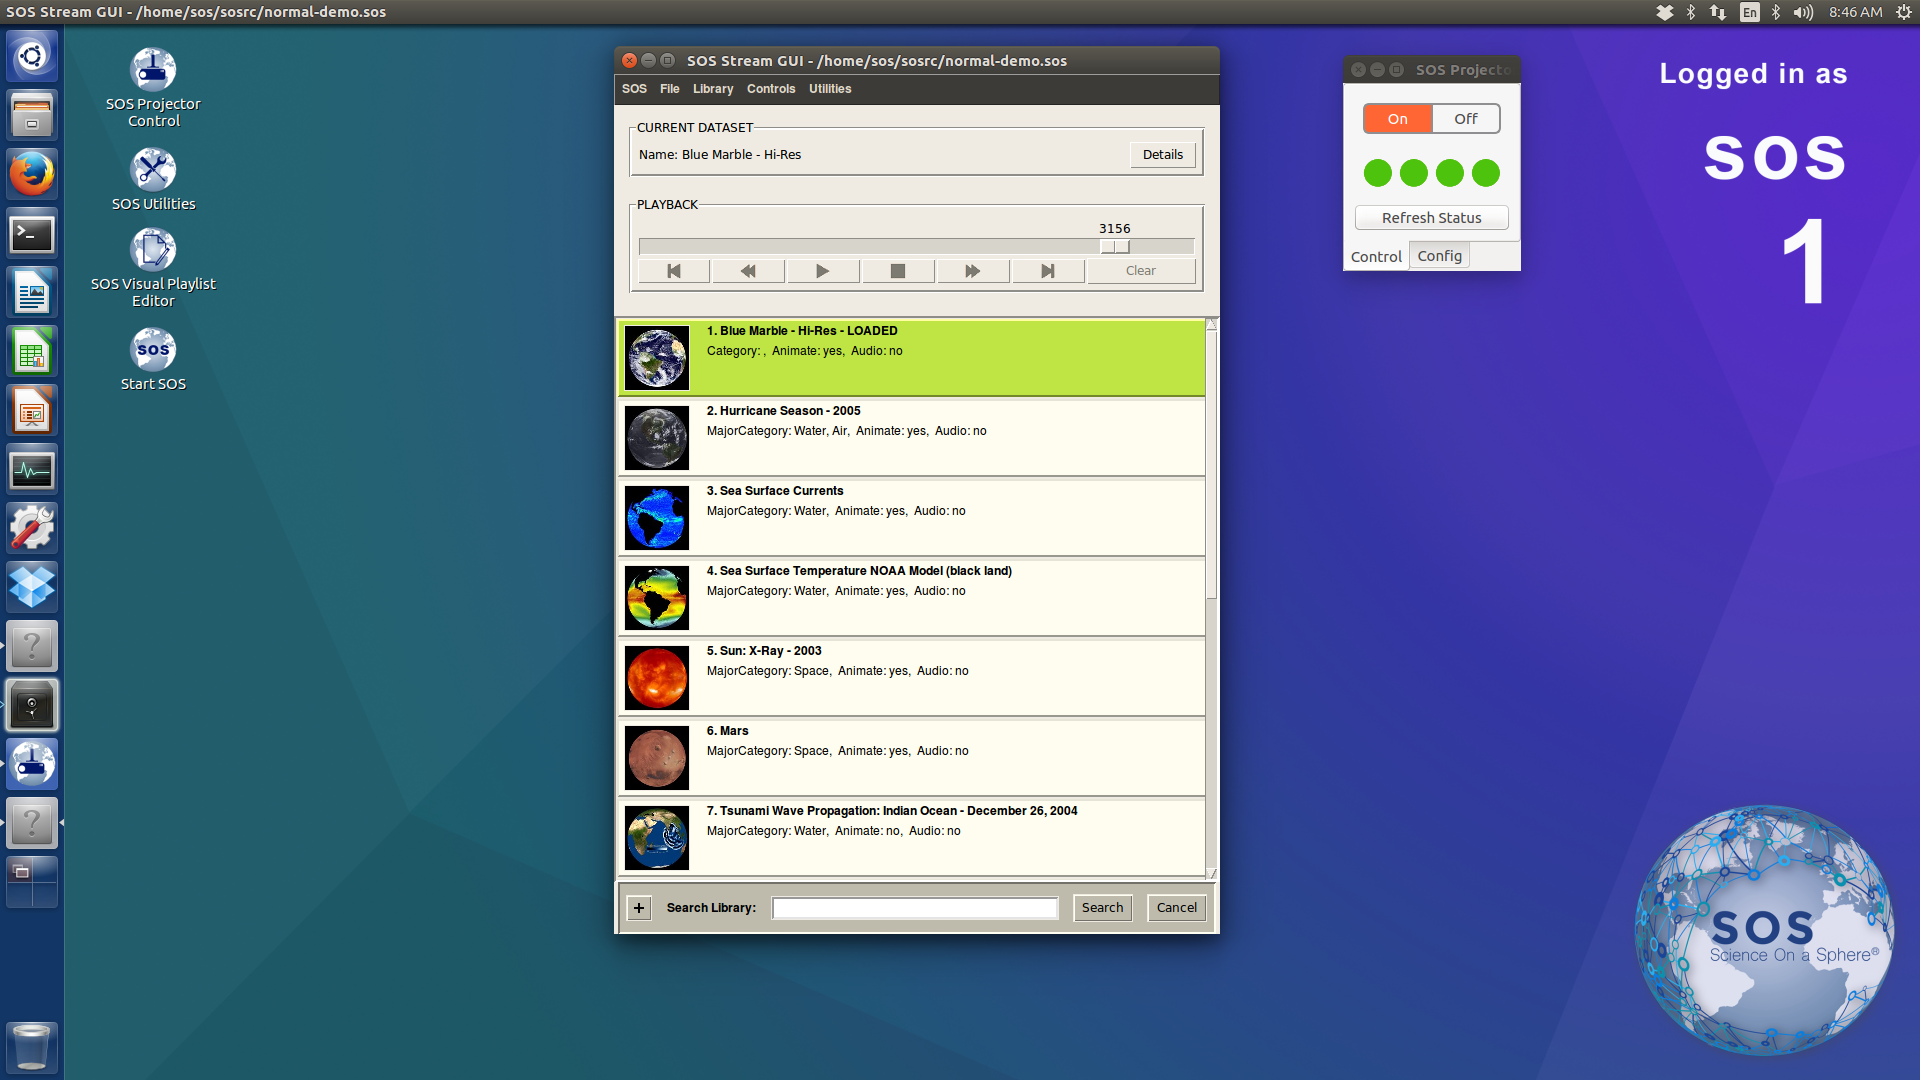
To the right of center is the SOS Projector Control GUI, which is used to control and troubleshoot the projectors. In the lower right corner is the SOS decorative graphic, which is shown on SOS desktops since release 5.2. In the center is the SOS Stream GUI, which appears when SOS is started. In the upper right corner, the current user will be shown (normally either sos or sosdemo) and the number 1 or 2, depending on which SOS machine you're logged into. In the upper left corner are four desktop icons to launch applications.
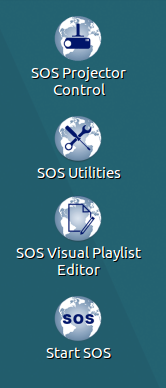
- The SOS Projector Control icon launches the Projector Control UI as described in the Projector Control section
- The SOS Utilities icon launches the SOS Utilities UI as described in the SOS Utilities section
- The SOS Visual Playlist Editor icon launches the Playlist Editor as described in the Visual Playlist Editor Manual
- The Start SOS icon launches SOS and brings up the SOS Stream GUI as described in the SOS Display Software Manual
Operating SOS
Permalink to Operating SOSThere are several alternative ways to operate Science On a Sphere®. The primary option that comes supported by the NOAA SOS team is the Remote App app, designed for use by docents and other SOS presenters.
SOS Stream GUI
Permalink to SOS Stream GUIWhen SOS is running, the SOS Stream GUI appears on the SOS desktop. It has basic controls for SOS that may be convenient when setting up or troubleshooting SOS. The SOS Stream GUI is described in the SOS Display Software Manual.
SOS Remote App
Permalink to SOS Remote AppIn order to connect the iPad to the SOS system, it must either be on the same Wi-Fi network as the SOS system or be paired to the computer using Bluetooth. Refer to the Network section above for specifics of the network. The most recent SOS Remote App is freely available through the Apple App Store for download onto Apple devices.
To get started with the Wi-Fi connection, tap on the Settings app icon on the homepage of your device, and then tap on SOS Remote located under the Apps category. In the Name or IP field under SOS computer to control, enter the host name or IP address of your SOS computer. Now, check the Wi-Fi network and make sure the iPad is connected to the right SOS network. Return to the homepage and tap on the SOS Remote app icon to open the application. The iPad should automatically connect. If it can’t connect, an alert badge will be displayed on the Settings tab and there will be an error message within the Settings tab. The SOS Stream GUI must be running in order for the iPad to connect.
While visitors have access to the SOS Remote App through the Apple App Store, they won’t be able to take control of the SOS unless they have the Wi-Fi password and the IP address of the SOS computer. For more information, see the SOS Remote App Manual.
In SOS version 4.3 we added the ability to connect an iPad to the SOS server over a bluetooth connection. Until this time all iPad/SOS server connections were over Wi-Fi. The iPad Bluetooth connection replaced the Wii remotes in SOS version 5.0. For information, refer to the document Connecting the iPad to the SOS Server via Bluetooth.
SOS Public Kiosk
Permalink to SOS Public KioskAnother way to operate SOS is with the touch screen-based Public Kiosk. As its name suggests, the Public Kiosk is a controller that museum visitors or other public users can perform simple controls on SOS when there is no presenter available. See the SOS Public Kiosk Manual for information on how to set up, customize, and operate the Public Kiosk.
Automation Control Protocol
Permalink to Automation Control ProtocolThrough the Automation Control Protocol, it’s possible for sites to create their own interfaces to control SOS. See the Automation Control Protocol Guide for additional information.
Usage Statistics
Permalink to Usage StatisticsThere are a set of features in the SOS software that show statistics about how often specific SOS data sets are displayed across the SOS network. At each SOS site, every SOS play event is logged in a usage log, in the $HOME/soslogs/ directory. Periodically, these log files are automatically collected and sent to the SOS developers in Boulder, CO. There, the logs are processed and the resulting aggregate statistics are displayed on the SOS web site.
Four main parameters are recorded:
- Plays
- All plays of clips on the SOS machine. Statistics are only shown for NOAA distributed datasets, but the proportion of site created to NOAA-provided datasets is shown
- Autoplays
- The plays that occurred while SOS is in autorun mode. This number will be a subset of Plays and is recorded so a distinction can be made between docent-led presentations and autorun presentations
- Duration
- The total amount of time a dataset has been played
- Autoplay Duration
- The fraction of duration that a dataset has been in autorun mode
SOS Utilities
Permalink to SOS UtilitiesThe SOS Utilities UI has buttons to perform various SOS system-related operations. You must be logged on as the sos user. The sosdemo user is more restricted and cannot run many of these operations.

- Download All Missing Datasets
- This is a useful operation that will sync your local datasets with the most update-to-date datasets from the NOAA SOS Servers. This includes static, real-time and spotlight datasets. This operation should help to keep your SOS machines in sync as needed. This can only be run as user sos.
- Check for SOS Update
- This will check for any available SOS and other Ubuntu updates and automatically install them. You will need to provide the SOS user password for this action. This can only be run as user sos.
- Edit SOS Settings
- Opens a GUI configuration manager to edit important SOS settings. This can only be run as user sos.
- Fix file permissions
- The program will attempt to change the access permissions on SOS files. Typically, it is useful if you receive any errors about not having the required permissions or access to files. This can only be run as user sos.
- Make a diagnostics log file
- Generates a sos_diagnostics.log file in the sos user home directory that can then be emailed to the sos.support@noaa.gov. Please provide a description of your problem in the email. The log file aids in identifying the problem with your system
- Start TeamViewer
- Launches the TeamViewer application so the SOS support team can work to fix your computer remotely
- Change projector model
-
Launches a program that lets you change the type of projector SOS is
configured for. If SOS is open when this program is run it will crash.
This can only be run as user sos. Note there are two options for each
projector type, CRT and DFP:
- If your new projectors are connected to the computer with UXGA or VGA cables, choose the option ending in CRT
- If your projectors are connected with DVI cables, choose the option ending in “DFP”. If you choose the wrong option, nothing will display on the sphere
- Restart video card output
- This option can be useful if you are having issues with your display such as blank projectors, projectors displaying incorrect colors or your monitor isn't blank. It restarts the X server. (Your displays will all go dark for a bit before they restart, this is normal.) This can only be run as user sos.
- Start Auto Alignment camera stream
- This option works with Auto Alignment (experimental feature) and requires additional equipment to be used. More information is described in the SOS Alignment Manual
- Make Primary Computer
- This operation is designed to help facilitate the transfer of SOS data and configuration files from your currently operating SOS machine to your backup SOS machine. This utility can be used to transfer site-custom datasets, playlist files, measurement and alignment data, as well as crontab configuration. This can only be run as user sos.
- Stop SOS program
- If something goes wrong with your SOS program and you need to terminate it, select this option
SOS Projector Control
Permalink to SOS Projector ControlThe newest Science On a Sphere (SOS) projector control debuted in the 5.2.0 release and is a refinement of the previous projector control. It provides improved user feedback and control of SOS projectors that use the “PjLink” or “PjTalk” protocols.
This software is automatically included with SOS during installation or upgrade, however the package is also available separately in its own debian package. This means that it is also available to previous SOS versions on Ubuntu 16.04.
Application Layout
Permalink to Application LayoutThe application is split into two main interfaces: a control interface and a configuration interface. Tabs at the bottom of the application may be used to toggle between the two interfaces.
Control Interface
Permalink to Control InterfaceThe control interface is simple and provides feedback on each projector’s state. The components of the control interface are: a power switch, status indicators for each projector, and a button which may be used to refresh the projector states.
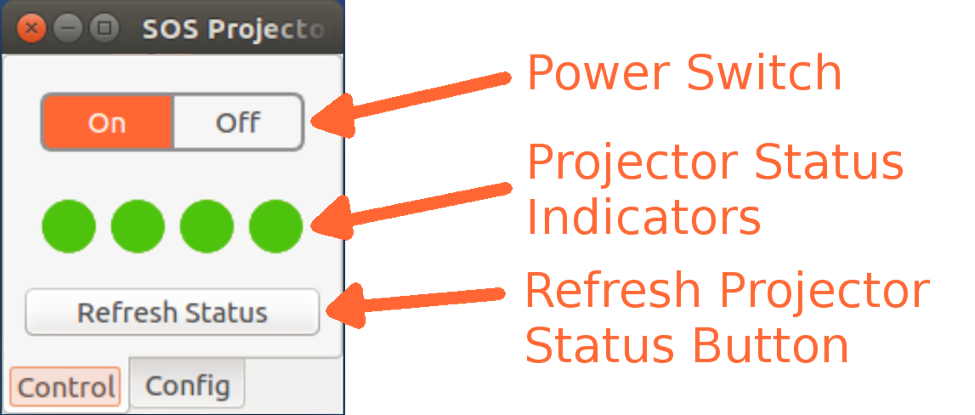
SOS Projector Control with the power switch in the "On" position and all projectors in an "On" state.
The projector status indicators use color to signal which of three possible states the projector is in:
- Yellow (Standby)
- The projector is in standby mode and ready to receive control commands
- Green (On)
- The projector is on and ready to receive control commands
- Red (Error)
- An error has been encountered with the last command sent to the projector
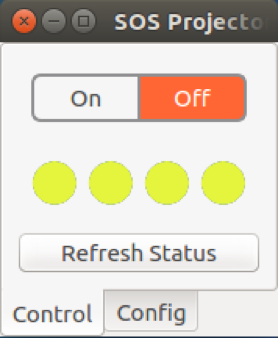
SOS Projector Control with the power switch in the "Off" position and all projectors in a "Standby" state.
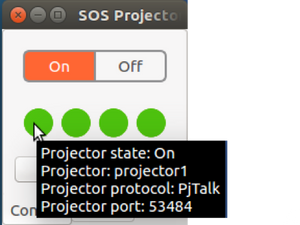
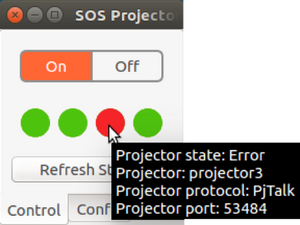
Hovering the mouse over any projector status indicator displays additional information about the projector. This information tells you the current state of the project, its name, the protocol it uses, and which port you connect on. The first image shows a tooltip for a projector that is on, the second shows a tooltip for a projector that has an error.
Typical reasons for errors include: no connection to the projector, the projector is rejection connections, the connection is timing out (default 3 seconds), or the incorrect port/protocol is being used with the projector.
Configuration Interface
Permalink to Configuration InterfaceThe configuration (config) interface is a tab where projector connection information may be specified. A default configuration is provided with the installation and the configuration consists of four PjLink projectors with host names “projector1”, “projector2”, “projector3”, “projector4”. This configuration should just work for most sites because those host names are correlated to the correct projector IP addresses in the “/etc/hosts” file. Some sites, however, may need to do additional configuration or revert to the previous projector control if their projectors do not support PjLink or PjTalk.
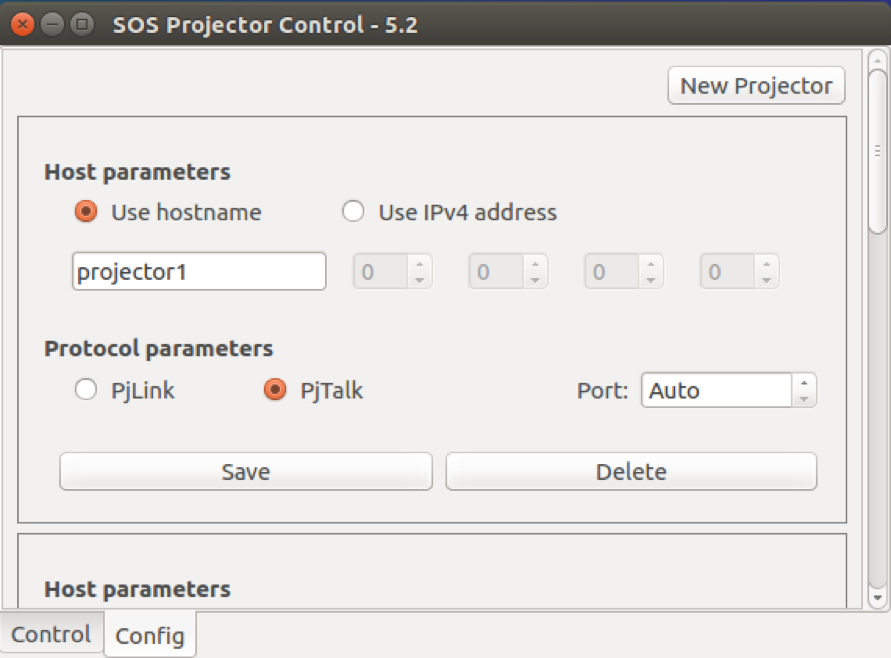
In this example, we are referring to projector1 by its hostname, "projector1". The connection is configured to use the PjTalk protocol and use the default port for PjTalk.
There are really only two types parameters for each projector: host parameters and protocol parameters. The host parameters specify how the projector will be identified, while the protocol parameters specify the communication protocol.
Host Parameters
Permalink to Host ParametersUnder Host Parameters, the projector may be referred to by its hostname or by its IP address. To refer to a projector by hostname, select the Use hostname radio button and type in the hostname of the projector. To refer to a projector by IP address, select the Use IPv4 address radio button and use the four spin boxes to set each octet of the IP address.
For example, the typical IP address of projector1 is 10.1.1.71. You can refer to the projector by hostname projector1, or you could select the Use IPv4 address radio button and enter 10 1 1 71 into each spinbox, respectively. The configuration is equivalent, but it’s usually easier to remember machines by hostname that by IP.
Protocol Parameters
Permalink to Protocol ParametersUnder Protocol Parameters, the PjLink or PjTalk protocol may be selected. Leaving the Port set to Auto (or 0) tells the controller to use the default port for the selected protocol. The default PjLink port is 4352 and the default PjTalk port is 53484.
Projector configurations may be updated using the Save button and deleted using the Delete button. New projector configurations may be added using the New Projector button. When the New Projector button is pressed, the config tab will add a new entry at the bottom of the tab and try to scroll down to it. An actual controller and status indicator will not be added until the configuration is successfully saved.
Only one entry per IP or hostname is allowed, however, there is no verification that checks whether or not a particular IP is associated with a hostname or a hostname with an IP.
Configuration File
Permalink to Configuration FileThe SOS Projector Control loads and saves projector configurations to a file located at /etc/NOAA/sos-projector-control/sos-projector-control.conf. This file should not need to be hand edited. Changes made to the configuration file will persist across projector control upgrades.
NOTE: The configuration file will be removed if the the projector
control package is purged (via sudo apt purge sos-projector-control). If you
would like to remove the projector control and keep your configuration file,
just remove the package (via sudo apt remove sos-projector-control).
Startup
Permalink to StartupThe installer will attempt to put desktop launchers on the desktops of the sos and sosdemo users. Double-clicking the SOS Projector Control desktop icon will launch the application.
When the SOS Projector Control is first started, it tries to obtain and display the status of each projector. If it determines that all the projectors are on, the power switch will automatically be moved to the On position. Otherwise, the power switch will remain in the Off position and each projector’s individual status will be displayed.
Thereafter, the projector control will try to keep the status indicators fairly current by checking the status of each projector every 90 seconds. The statuses can also be refreshed on demand with the Refresh Status button.
Command Line Interface
Permalink to Command Line InterfaceThe control may also be used from the command line. Opening a terminal, typing
launch_pj_control, and pressing Enter will start the application. Passing an
argument of on or off to the application will make the application attempt
to turn on or off each projector in the config file, then exit. This is useful
for turning on and off projectors with the crontab.
For example, to send the “on” command to each projector in the config file, run:
launch_pj_control on
To send the “off” command to each projector in the config file, run:
launch_pj_control off
Using the projector control in the crontab
Permalink to Using the projector control in the crontabUsing the projector control in the crontab is similar to running it from the command line. One difference is that you’ll need to use the full path of the executable and set the display environment variable to that of the desktop.
Since the desktop display is on X screen :0, the command becomes:
env DISPLAY=:0 /usr/bin/launch_pj_control
Therefore, if you would like to turn on your projectors every day at 7:30 and off at 5:30, add the following lines to your crontab.
# Turn projectors on at 7:30am
30 7 * * * env DISPLAY=:0 /usr/bin/launch_pj_control on > $HOME/soslogs/projector_ctl.log 2>&1
# Turn projectors off at 5:30pm Monday - Saturday
30 17 * * * env DISPLAY=:0 /usr/bin/launch_pj_control off > $HOME/soslogs/projector_ctl.log 2>&
Good references for crontab formatting can be found online, but contact us if you’re having issues just e-mail sos.support@noaa.gov.
Reverting to the Old Projector Control
Permalink to Reverting to the Old Projector ControlWhen upgrading from SOS 5.1.0 or 5.1.1, the new projector control installer will backup your old projector control desktop launcher before installing its own. In the event that the projector control doesn’t work with your projectors, you may revert to the previous projector control by opening a terminal and running the command:
mv ~/Desktop/.Projector_Control.desktop ~/Desktop/Projector_Control.desktop
The old desktop launcher should then appear on your desktop.
Known Issues
Permalink to Known Issues- No title bar on application: sometimes when the application is started, there is no title bar. This prevents a user from moving or closing the window. To get the title bar to show up, toggle between the config and control tabs. This breaks that application away from the top of the screen
- Projector status indicators don’t show up in the same sequence as when they were added: When adding new projectors to the projector control, they will be appended to the end of the config tab and corresponding status indicators will be added to the next available position in the control tab. However, when the application is closed and re-opened, the status indicators are then in alphabetical order. This is due to the fact the the projector configurations are always saved alphabetically, then loaded in that order
- The projector control resizes when switching tabs: this is the intended behaviour. We try to keep the window small and unobtrusive when in the control tab, but expand it so that the configuration panel fits into view when in the config tab
- The projector control doesn’t look exactly like the screenshots: the application uses a framework that tries to take local operating systems preferences into account when displaying itself. The exact look of your projector control may vary according to those preferences
- Projector control is slow to start: this usually occurs if the the control cannot talk to the projectors. The control tries to update its status before showing itself and if the control can’t reach the projectors, a timeout must be overcome. This issue will be fixed in future versions
Appendix A: SOS Stream Control Configuration File
Permalink to Appendix A: SOS Stream Control Configuration FileIf you’re on SOS version 5.5 or above, please visit Appendix B: SOS Configuration Manager.
Each site’s configuration for projector height, distance and resolution are stored in /home/sos/sos_stream_control.config. The parameters in this file are set during installation and normally should only be changed if the exhibit is reconfigured.
The first part of the file may be edited while the last part should not be changed. The dividing line between these two parts is clearly demarcated. The editable part is shown here, divided into separate blocks to provide more explanation. To change the default value for a given setting, uncomment the line in a text editor and use or change the value there. In older systems, some of these settings may be missing, in which case you can add them and set the value you need.
Autorun Timer
Permalink to Autorun TimerThe length in seconds for playing a dataset in autorun mode. The default value of 180.
# Default amount of time (in seconds) a clip will play in autorun mode, if not
# set specifically in the playlist.
#set defaultTimer 10
Default Volume
Permalink to Default VolumeThe default volume level to use as a percentage of the system equipment volume. The valid range is 0 to 100.
# Default mplayer volume level for each clip that does not explicitly specify a
# level using the 'volume' keyword. Note that mplayer volume can only be a
# fraction of what the system volume is. So, if the system volume is set to 50%
# and the defaultVolume is set to 50%, the output volume will be 25%.
#set defaultVolume 75
Maximum Frame Width in SOS
Permalink to Maximum Frame Width in SOSThe maximum frame width supported in SOS. The default value of 4096 is normally used, but may be increased for 4K systems.
# Max texture size for SOS data. The default is 4096.
#set env(SOS_MAX_TEXTURE_SIZE) 8192
Default Playlist
Permalink to Default PlaylistPath to a playlist that is automatically loaded each time the SOS system first starts up. The default is the nomal-demo.sos playlist in either /home/sos/sosrc or /home/sosdemo/sosrc, depending on which user starts SOS.
# Default playlist that opens with the SOS GUI.
set auto_open_sos_file $env(HOME)/sosrc/normal-demo.sos
Projector Settings
Permalink to Projector SettingsThese properties are typically set when first installing the SOS equipment. They will not require editing afterward unless the number or type of projectors are changed.
# Default gamma setting for projectors to facilitate edge blending.
set gamma 0.8
set fullScreen "-fullScreen"
set projectorInfo(viewport) { 0,0,0.5,0.5 0.5,0,0.5,0.5 0,0.5,0.5,0.5 0.5,0.5,0.5,0.5 }
set projectorInfo(hostname) { localhost localhost localhost localhost }
set numberOfProjectors 4
set env(SOS_DISPLAY) :1
set bottommask 60,70
Text PIP
Permalink to Text PIPNew for SOS v5.2. These properties are typically set when first installing the SOS equipment, and are used to achieve optimal text resolution on the sphere. They will not require editing afterward unless the number or type of projectors are changed.
## Text PIP Configuration: ##
# Native resolution for a single projector in the SOS display.
set env(SOS_PROJECTOR_WIDTH) 1920
set env(SOS_PROJECTOR_HEIGHT) 1200
# Number of projectors.
set env(SOS_NUM_PROJECTORS) 4
# Total degrees longitude of display. Typically, 90 degrees per projector.
set env(SOS_DISPLAY_DEGREES_WIDTH) 360
# Total degrees latitude of display. Typically, total is 180 degrees.
set env(SOS_DISPLAY_DEGREES_HEIGHT) 180
## End Text PIP Config ##
Magnify Graphics
Permalink to Magnify GraphicsNew for SOS v5.3. This property determines whether to show graphics elements (text and image PIPS, labels, icons, and annotation lines) inside the zoom magnifier window. By default, they are shown. Valid values are 1 (on) or 0 (off).
set env(SOS_MAGNIFY_GRAPHICS) 1
Display Performance
New for SOS v5.3. These properties determine system settings related to image display. They may be modified to tune SOS performance but generally won’t need to be changed once set.
# Set thread count. Default is 4

set env(SOS_THREAD_COUNT) 6


# Set stream size (number of frames SOS keeps in memory at a time).
# Default is 20.
set env(SOS_STREAM_SIZE) 30
Auto Alignment (Experimental Feature)
Permalink to Auto Alignment (Experimental Feature)These properties are typically set when first installing the experimental auto alignment camera equipment. They with probably will not require editing unless the type of camera is changed.
## Auto-Alignment Configuration: ##
# Set the cameras we want to use. Options are: V4L2 or POINTGREY.
# Unless you are a legacy installation, you will want to use POINTGREY.
set env(SOS_CAMERA_LIBRARY) POINTGREY

# (default) Point Grey - BlackFly resolution is 1280x960
# V4L2 - Full resolution web cam is 2304x1536.
# V4L2 - Low resolution is typically set at 640x480
set env(SOS_MAX_CAMERA_WIDTH) 1280
set env(SOS_MAX_CAMERA_HEIGHT) 960
## End Auto-Alignment Config ##
Exhibit Distances
Permalink to Exhibit DistancesThese properties are typically set when first installing the SOS equipment. The “projectoyInfo” property changes where latitude 0 degrees will be located relative to the projectors.
The other properties are measurements that must be as accurate as possible to get a good alignment of the projectors. They will not require editing afterward unless the position of the sphere or any of the projectors are changed.
# Default orientation of all datasets around the z-axis, in degrees, when they
# are first loaded on the sphere.
#set projectorInfo(projectorRotation) 0

# Measured height, in inches, of the equator.
set Sphere_Height_At_Equator_Inches 84.0

# Measured height, in inches, of each projector lens.
# By experience, 1 inch lower than real height makes better alignment.
set P1_Height_Inches 92.0
set P2_Height_Inches 92.0
set P3_Height_Inches 92.0
set P4_Height_Inches 92.0

# Horizontal distance, in inches, of each of the four projectors from sphere
# center.
set P1_DIST_INCHES 211.0
set P2_DIST_INCHES 211.0
set P3_DIST_INCHES 211.0
set P4_DIST_INCHES 211.0
Appendix B: SOS Configuration Manager
Permalink to Appendix B: SOS Configuration ManagerThe SOS Configuration Manager is a new application that comes with SOS version 5.5. If you open the “SOS Utilities” application on your Desktop, there will be an option called “Edit SOS Settings”. Please note that in order to run this application, you will need to be logged in as user SOS. This application provides a replacement for the /home/sos/sos_stream_control.config file from previous versions.
This application is a graphical editor for a new file /shared/sos/site-config/local_sos_config.json. This is now where all of your configuration and SOS settings are held (the same exact settings from Appendix A above). You can hand edit the file if you’d like through the terminal, but the graphical interface makes the process much simpler.

In the SOS Configuration Manager, the settings are categorized into groups such as “Presentation” and “Sphere Measurements”, which help to keep everything organized. Some settings have provided drop-down boxes, to help give recommendations on what values are expected. From here, you can edit the values of each setting, and then click save to apply the changes.
There are arrows to the left of each setting’s name. If you click one, it will open the description of the setting, as well as provide the default value that comes pre-loaded with SOS. If you want to reset your entire configuration to its defaults, you can click the File menu at the top, and choose the Reset to Factory Defaults option, which will overwrite your file with the default values for each setting. It is important to record at least the “Sphere Measurements” categories values, as these are usually set at install time and you will not want to have to remeasure those distances.